
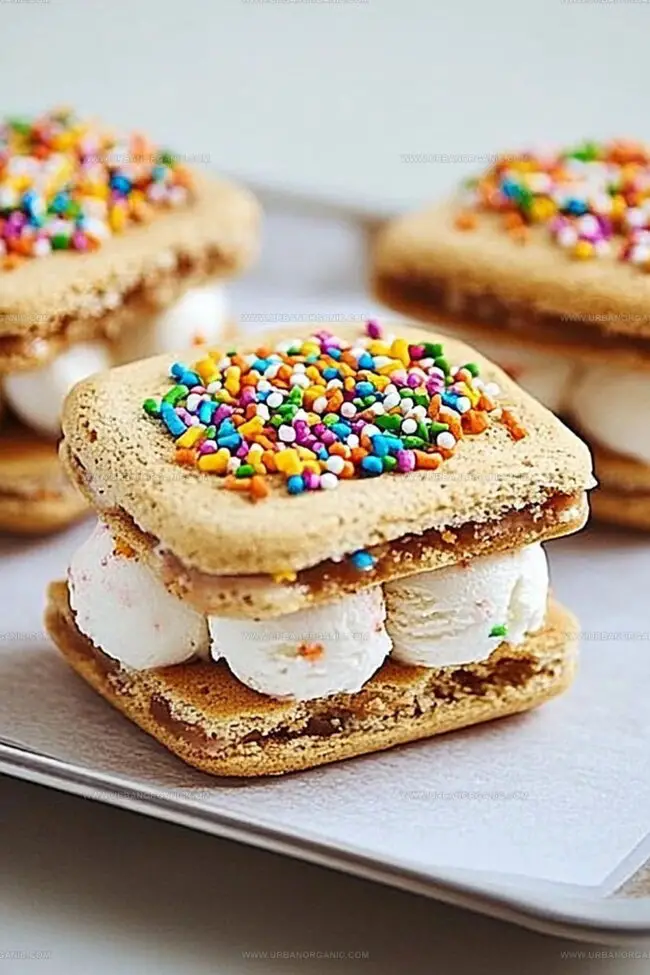
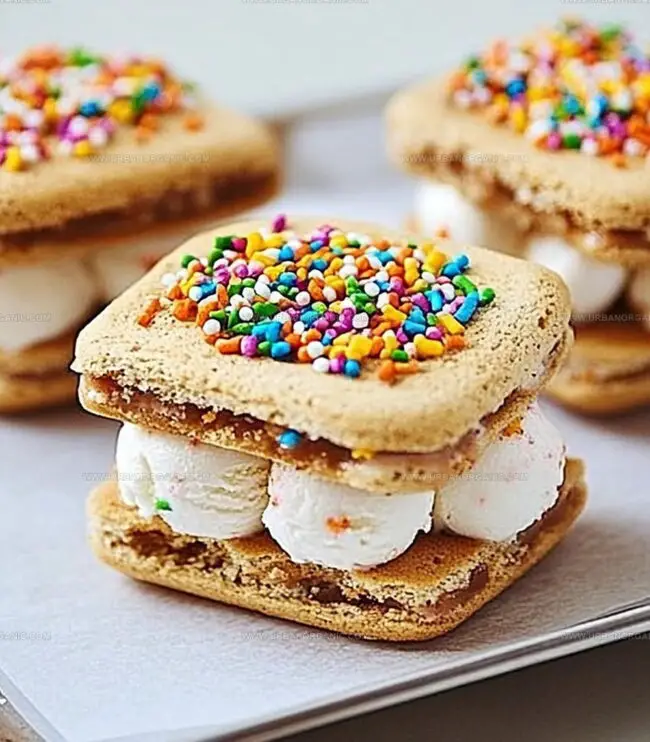
Vanilla Ice Cream Sandwiches Recipe for Sweet Joy
Crafting homemade vanilla ice cream sandwiches could become your delightful weekend adventure.
Summer afternoons call for cool, sweet treats that surprise everyone.
Classic desserts often spark unexpected memories and excitement.
Soft cookies hugging creamy vanilla create a nostalgic experience that connects generations.
Unexpected combinations make these sandwiches more than just another dessert.
Imagine biting through crisp, buttery edges into smooth, chilled centers.
You’ll want to share these irresistible delights with anyone nearby.
Why Vanilla Ice Cream Sandwiches Never Go Out of Style
What’s in a Great Vanilla Ice Cream Sandwich
Ice Cream Base:Chocolate Wafer Ingredients:Wet Ingredients:Preparation Ingredients:How to Make Vanilla Ice Cream Sandwiches from Scratch
Step 1: Craft Smooth Ice Cream Layer
Grab a 9×13-inch pan and line it with parchment paper, letting edges hang over.
Spread softened vanilla ice cream across the pan, smoothing the surface completely.
Place in freezer until rock solid (about 2 hours or overnight).
Step 2: Bake Chocolate Wafer Cookies
Warm oven to 350F.
Prepare ingredients:Cream butter and sugar until fluffy and light.
Mix in vanilla and eggs, blending thoroughly.
Fold dry ingredients into wet mixture until just combined.
Divide dough into two portions.
Roll each portion between parchment paper sheets to thin consistency.
Transfer rolled dough to baking sheet.
Bake 10-12 minutes until edges set.
Cool cookies completely.
Step 3: Build Delicious Sandwich Treats
Trim cookie edges for clean lines.
Slice each wafer sheet into 12 equal rectangles.
Extract frozen ice cream slab from freezer.
Cut ice cream into matching rectangular shapes.
Place ice cream between two chocolate wafers.
Press gently to secure sandwich.
Individually wrap each sandwich in parchment paper.
Freeze until perfectly firm (around 1 hour).
Enjoy your homemade ice cream sandwiches!
Tips That Help with Ice Cream Sandwich Assembly
Save and Enjoy Ice Cream Sandwiches Later
What to Pair with Vanilla Ice Cream Sandwiches
Fun Twists on Ice Cream Sandwich Flavor
Vanilla Ice Cream Sandwiches – Your Questions Answered
No, they’re actually quite simple! The recipe requires basic baking skills and just a few steps of preparing wafers, spreading ice cream, and assembling. Even beginner bakers can successfully create these delicious treats.
Yes, you can swap vanilla ice cream with other flavors like chocolate or strawberry. For the chocolate wafers, you might use gluten-free flour if needed. Just ensure similar measurements and consistency.
They’ll stay fresh for about 2-3 weeks when properly wrapped in parchment or wax paper and stored in an airtight container. Make sure to keep them consistently frozen to maintain their texture and taste.
No special equipment is required. You’ll just need standard baking tools like a 9×13-inch pan, baking sheet, parchment paper, mixing bowls, and a rolling pin. Most home kitchens have these items already.
Print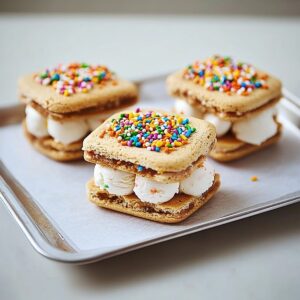
Vanilla Ice Cream Sandwiches Recipe
- Total Time: 40 minutes
- Yield: 12 1x
Description
Cool summer days find magic in homemade Vanilla Ice Cream Sandwiches, nestled between perfectly crisp chocolate cookies. Creamy vanilla ice cream and rich chocolate wafers merge into an irresistible dessert that promises sweet comfort with each delightful bite.
Ingredients
Chocolate Wafers:
Main Ingredients:
- 1 ¼ cups (283 grams/10 ounces) unsalted butter, softened
- 1 ¼ cups (250 grams/8.8 ounces) granulated sugar
- 2 large eggs
Dry Ingredients:
- 1 cup (120 grams/4.2 ounces) all-purpose flour
- 1 cup (100 grams/3.5 ounces) unsweetened cocoa powder
- ½ teaspoon baking powder
- ½ teaspoon salt
Flavor Enhancers:
- 1 tablespoon vanilla extract
Filling:
- 1 ½ quarts (6 cups/1.4 liters) vanilla ice cream, softened
Instructions
- Craft the frozen vanilla essence base by lining a rectangular container with parchment paper, ensuring overhanging edges for effortless extraction. Distribute the softened vanilla cream uniformly across the surface, creating a smooth, level plane. Chill thoroughly in the freezer until solidly set.
- Heat the oven to moderate temperature at 350°F. Prepare a baking surface with protective parchment. Combine flour, cocoa, leavening agent, and seasoning in a mixing vessel. In a separate large container, thoroughly blend butter and sugar until airy and voluminous. Incorporate liquid vanilla and eggs, whisking vigorously after each addition. Gradually fold dry ingredients into wet mixture, mixing minimally to prevent toughness.
- Partition dough into two equal portions. Roll each segment between parchment sheets until achieving a thin, uniform consistency. Transfer carefully to prepared baking surface, removing top parchment layer. Bake until edges appear crisp and center sets, approximately 10-12 minutes. Allow complete cooling.
- After wafers reach room temperature, trim edges to create precise rectangular shapes. Slice each sheet into 12 identical sections. Extract frozen cream base and cut matching rectangular portions.
- Construct sandwiches by positioning a cream rectangle between two chocolate wafers, applying gentle pressure to secure. Individually wrap each creation in parchment, then return to freezer until thoroughly chilled and stabilized.
Notes
- Chill baking pan thoroughly before spreading ice cream to ensure a smooth, even layer without melting or creating air pockets.
- For uniform wafer thickness, use rolling pin guides or wooden dowels on either side of dough to maintain consistent 1/4-inch depth.
- Dust work surface with cocoa powder instead of flour when rolling chocolate wafers to enhance rich chocolate color and prevent drying out.
- Experiment with alternative ice cream flavors like mint chocolate chip, coffee, or salted caramel for unique sandwich variations that complement chocolate wafers.
- Prep Time: 10 minutes
- Cook Time: 30 minutes
- Category: Desserts, Snacks
- Method: Baking
- Cuisine: American
Nutrition
- Serving Size: 12
- Calories: 353
- Sugar: 22g
- Sodium: 110mg
- Fat: 22g
- Saturated Fat: 13g
- Unsaturated Fat: 9g
- Trans Fat: 0g
- Carbohydrates: 36g
- Fiber: 2g
- Protein: 3g
- Cholesterol: 55mg
Jessica Martinez
Pastry Chef & Recipe Developer
Expertise
Organic Baking Techniques, Gluten-Free Recipe Development, Southwestern Dessert Specialties, Food Styling and Photography
Education
Santa Fe Community College (SFCC)
Jessica brings the sweet side to Urban Organic with her passion for baking and love for the Southwest. She trained at Santa Fe Community College and has built a career creating beautiful, gluten-free, and organic desserts that feel both nostalgic and new.
She believes baking should be fun, creative, and open to everyone, no matter your diet or skill level. Jessica’s recipes are simple enough to follow, but special enough to remember.