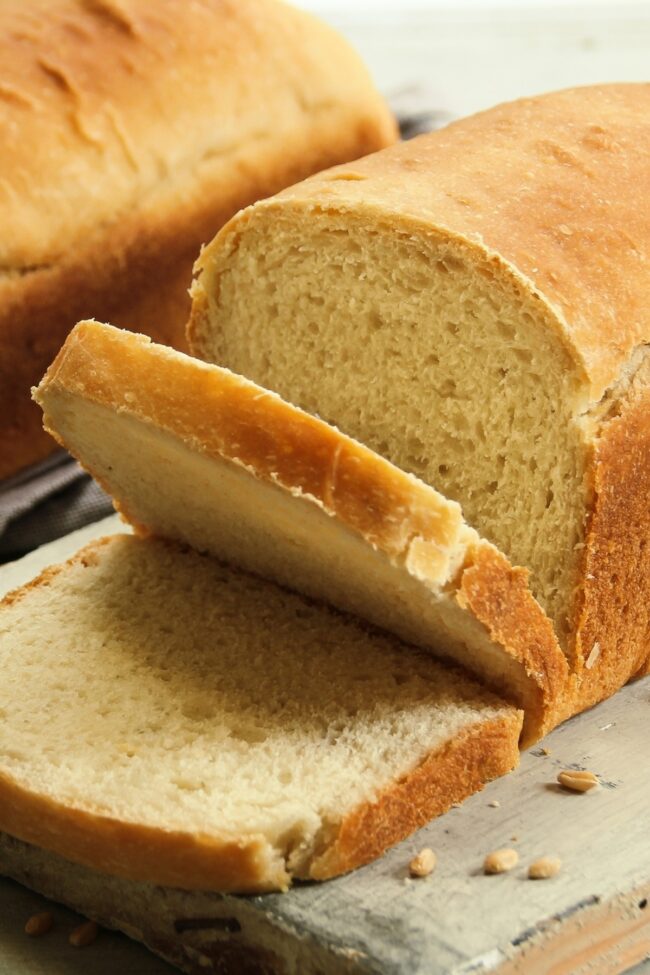
White sandwich bread whispers comfort and home in every delectable slice.
Generations of bakers have perfected this simple yet magical recipe that turns basic ingredients into pure magic.
Soft, pillowy textures emerge from a humble mix of flour, yeast, and love.
Each kneading motion tells a story of culinary tradition and family connection.
Warm, golden loaves promise to transform ordinary meals into extraordinary moments.
Your kitchen will burst with inviting aromas that draw everyone closer.
The journey from raw ingredients to golden perfection awaits, promising a delicious adventure that feeds both body and soul.
Quick Recipe Overview
Prep Time: 25 minutes
Cook Time: 35 minutes
Total Time: 1 hour
Calories: 150 kcal
Servings: 2
Ingredients for White Sandwich Bread
For Yeast Activation:
Active Dry Yeast: Choose fresh, unexpired yeast for maximum rising power and vibrant bread texture.
Warm Water: Select filtered or bottled water for consistent temperature and pure flavor.
Granulated Sugar: Opt for white sugar to help feed and activate the yeast effectively.
Salt: Use fine-grain table salt to evenly distribute and enhance overall bread flavor.
Unsalted Butter: Select high-quality butter for rich, smooth taste and soft bread texture.
For Flour and Dry Ingredients:
All-Purpose Flour: Pick unbleached flour for better texture and more natural wheat flavor.
Additional Flour: Keep extra flour on hand for dusting and adjusting dough consistency.
For Baking Preparation:
Vegetable Oil or Cooking Spray: Use a neutral oil to grease pans and prevent bread from sticking.
Loaf Pans: Select non-stick or well-seasoned pans for even baking and easy bread removal.
Baking Equipment for Sandwich Bread Perfection
Large mixing bowl: Perfect for combining ingredients and mixing dough.
Wooden spoon: Essential for stirring and incorporating flour smoothly.
Measuring cups: Helps measure water, flour, and other ingredients accurately.
Kitchen thermometer: Ensures water is at the right temperature for yeast activation.
Clean surface: Ideal spot for kneading dough with a light flour dusting.
Plastic wrap: Covers dough during rising to prevent drying out.
Loaf pans: Gives bread its classic shape and helps with even baking.
Cooling rack: Allows air circulation around bread after baking, preventing soggy bottoms.
Oven: Provides the perfect environment for bread to rise and bake to golden perfection.
How to Make Pioneer Woman White Sandwich Bread
Awaken the Yeast Brew warm water and sprinkle yeast, letting it dissolve completely. Blend in melted butter, sugar, and salt until smooth and unified.
Transform the Mixture Gradually fold flour into the liquid base, stirring consistently until a soft, cohesive dough emerges. Transfer the tacky mixture onto a lightly dusted surface and begin gently working the dough.
Develop Texture Knead the dough with passionate, rhythmic motions for about 10 minutes. The goal is creating a silky, responsive texture that springs back when touched. Place the transformed dough into a greased container, covering it to rest and expand in a cozy environment for approximately one hour.
Shape and Prepare Tenderly deflate the risen dough, then divide and mold into two elegant loaf shapes. Nestle each formation into prepared baking vessels, allowing them to rise and plump up for roughly 45 minutes.
Bake to Perfection Slide the loaves into a preheated oven, watching for a rich golden crust. After 30-35 minutes, confirm doneness by tapping the bottom – a hollow sound signals success. Transfer to a cooling surface, resisting the temptation to slice until completely cooled.
Useful Tweaks for Sandwich Bread Texture
Boost Yeast Performance: Ensure water temperature is precisely between 105-115°F for optimal yeast activation. Cold water slows down fermentation, while hot water kills the delicate microorganisms.
Flour Power Swap: Experiment with whole wheat, rye, or bread flour to create unique texture and flavor profiles. Each flour type brings distinctive characteristics that transform the bread’s final taste and density.
Flavor Enhancement Tricks: Sprinkle sesame seeds, dried herbs, or everything bagel seasoning on top before baking for extra gourmet touches. These simple additions elevate the bread from basic to restaurant-quality in seconds.
Moisture Preservation Technique: Store freshly baked bread in a sealed plastic bag or bread box at room temperature. Adding a paper towel inside helps absorb excess moisture and keeps the loaf soft for 3-4 days without becoming soggy.
How to Serve Fresh White Sandwich Bread
Serve Warm and Fresh: Pull out the bread right from the oven and slice it while still warm for a mouthwatering experience of soft, pillowy texture that melts in your mouth.
Pair with Spreads and Dips: Slather homemade butter, creamy jam, honey, or olive oil with herbs to enhance the bread’s delicious flavor and create a delightful breakfast or snack.
Create Sandwich Masterpieces: Transform these freshly baked loaves into incredible sandwiches by layering crisp vegetables, savory meats, or creamy spreads for a satisfying meal that will impress family and friends.
Accompaniment for Comfort Meals: Serve alongside hearty soups, stews, or salads to add a comforting touch and soak up delicious broths and sauces with each delectable bite.
Storage Advice for Homemade Sandwich Bread
Preserve Fresh Flavor: Store homemade bread in an airtight container at room temperature for 3-4 days to maintain optimal taste and texture.
Freeze for Future Enjoyment: Wrap cooled bread tightly in plastic wrap, then aluminum foil, and freeze up to 3 months for convenient long-term storage.
Revive Day-Old Bread: Refresh slightly stale bread by warming in the oven at 300°F for 5-10 minutes, restoring its soft, warm character.
Prevent Moisture Buildup: Always cool bread completely before storing to prevent condensation and potential mold growth, ensuring maximum freshness and quality.
White sandwich bread from the Pioneer Woman blends simple ingredients into a classic, comforting loaf. Homemade slices promise warmth and satisfaction for anyone seeking nostalgic kitchen comfort.
Ingredients
Scale
2 cups (480 ml) warm water
2 ¼ tsps (7 g) active dry yeast
5 ¼ cups (660 g) all-purpose flour
4 tbsps (57 g) butter, melted
1 tbsp (12 g) sugar
2 tsps (10 g) kosher salt
Butter for greasing bowl and loaf pans
Additional flour for kneading
Instructions
Yeast Activation: Dissolve yeast in warm water at 110°F, blending with melted butter, sugar, and salt until a harmonious mixture emerges.
Dough Formation: Incorporate flour progressively, stirring vigorously to create a smooth, homogeneous dough without dry flour remnants. Knead on a floured surface for 8-10 minutes, developing an elastic texture that rebounds when pressed.
First Fermentation: Transfer dough to a greased bowl, covering with a clean towel. Allow to rise in a warm space for 60 minutes until dramatically expanded, creating a pillowy, robust foundation.
Shaping and Proofing: Deflate the risen dough and divide into two equal portions. Shape into smooth loaves, positioning them in greased 9×5-inch baking pans. Cover loosely and let rise for 40-45 minutes until significantly puffed.
Baking and Finishing: Preheat oven to 400°F. Bake loaves for 30-35 minutes until achieving a rich golden crust that sounds hollow when tapped. Immediately transfer to a wire rack, allowing complete cooling for one hour before slicing to maintain structural integrity.
Notes
Check Yeast Viability: Ensure your yeast is fresh and active by observing bubble formation in warm water; inactive yeast will prevent proper bread rising.
Master Kneading Technique: Press and fold dough consistently for 8-10 minutes to develop gluten structure, creating a smooth, elastic texture that guarantees soft bread.
Control Rising Environment: Maintain a warm, draft-free space around 80-85°F for optimal dough expansion; cooler temperatures significantly slow down fermentation.
Precise Baking Temperature: Use an oven thermometer to confirm accurate 400°F heat, preventing undercooked centers or overly dark crusts that compromise bread quality.
Classical & Contemporary Cooking Techniques, Global Cuisine Appreciation, Nutrition & Menu Engineering, Sustainable Cooking Practices, Farm-to-Table Cuisine
Education
Southwestern Oregon Community College
Program: Culinary Arts, Associate of Applied Science
Focus: Emphasis on mastering core culinary competencies, like safety and sanitation, hot, cold, and pastry techniques, while cultivating appreciation of global cuisines and developing operational skills in nutrition, menu design, costing, purchasing, and supervisory management.
Michael grew up in Oregon, where he learned early that food tastes better when it’s fresh, local, and made with care.
After earning his degree from the Southwestern Oregon Community College, he focused his career on teaching others how to cook with the seasons, reduce food waste, and reconnect with what’s on their plate.
Michael keeps his cooking simple, sustainable, and full of flavor. His favorite part of the process? Watching people realize how easy and satisfying it can be to cook a single great meal from scratch.


Michael Thompson
Founder & Culinary Director
Expertise
Classical & Contemporary Cooking Techniques, Global Cuisine Appreciation, Nutrition & Menu Engineering, Sustainable Cooking Practices, Farm-to-Table Cuisine
Education
Southwestern Oregon Community College
Michael grew up in Oregon, where he learned early that food tastes better when it’s fresh, local, and made with care.
After earning his degree from the Southwestern Oregon Community College, he focused his career on teaching others how to cook with the seasons, reduce food waste, and reconnect with what’s on their plate.
Michael keeps his cooking simple, sustainable, and full of flavor. His favorite part of the process? Watching people realize how easy and satisfying it can be to cook a single great meal from scratch.