
Blast from the Past: Zingy Retro Green Jello Salad Recipe
When summer gatherings call for a nostalgic green jello salad that sparks conversations and delights taste buds, this classic recipe delivers pure culinary magic.
Wiggly, vibrant, and packed with unexpected textures, the recipe brings a playful twist to potluck tables everywhere.
Generations have cherished these whimsical gelatin creations that blend sweet and creamy elements with surprising ingredients.
Marshmallows, crushed pineapple, and a smooth cream cheese layer transform this dessert into a memorable treat.
Cool and refreshing, the salad offers a delightful blend of flavors that dance across your palate.
Each spoonful promises a journey through mid-century culinary creativity.
You’ll find this retro recipe is the perfect conversation starter at any gathering.
Quick Recipe Overview
Ingredients That Go Into Classic Green Jello Salad
For Base and Flavor:For Creamy Texture:For Fruity Crunch:For Optional Enhancements:Tools That Help Mix and Chill Green Jello Salad
How to Make Green Jello Salad That’s Festive and Fun
Grab a big mixing bowl and pour lime Jello powder. Add steaming hot water and stir until the powder completely vanishes.
Pour cold water and dump crushed pineapple into the Jello mixture. Mix everything thoroughly until well combined.
Take softened cream cheese and beat it until silky smooth. Gently fold the cream cheese into the Jello blend, creating a creamy texture.
Pop the mixture into the refrigerator for around 30-45 minutes. You want it slightly thickened but not completely solid.
Fold in whipped topping and any bonus ingredients like marshmallows or chopped nuts. Distribute evenly throughout the mixture.
Transfer the mixture into your favorite serving dish. Return to the refrigerator and let it set completely for at least 4 hours.
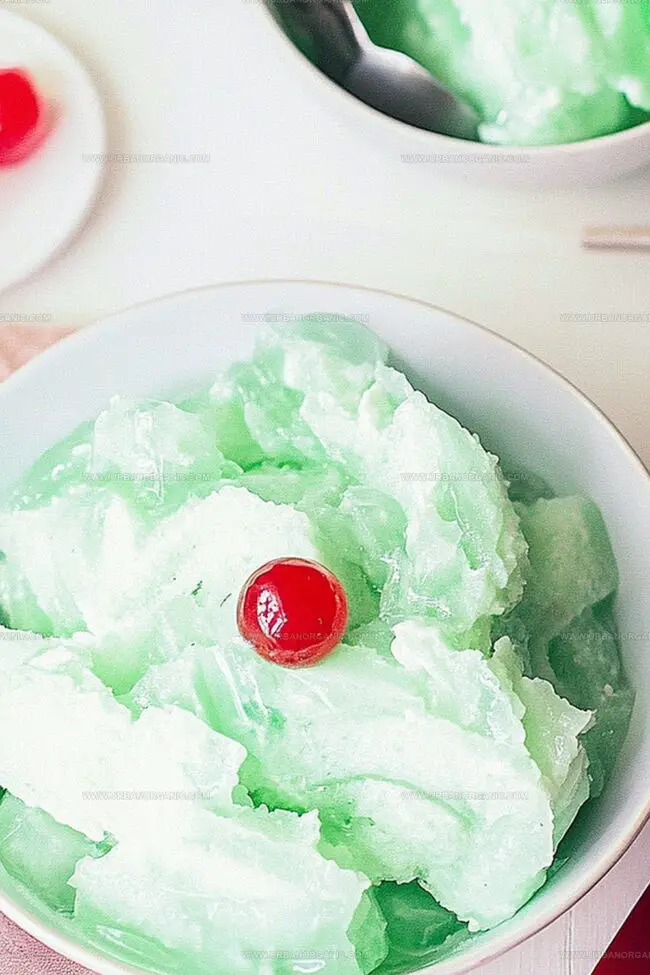
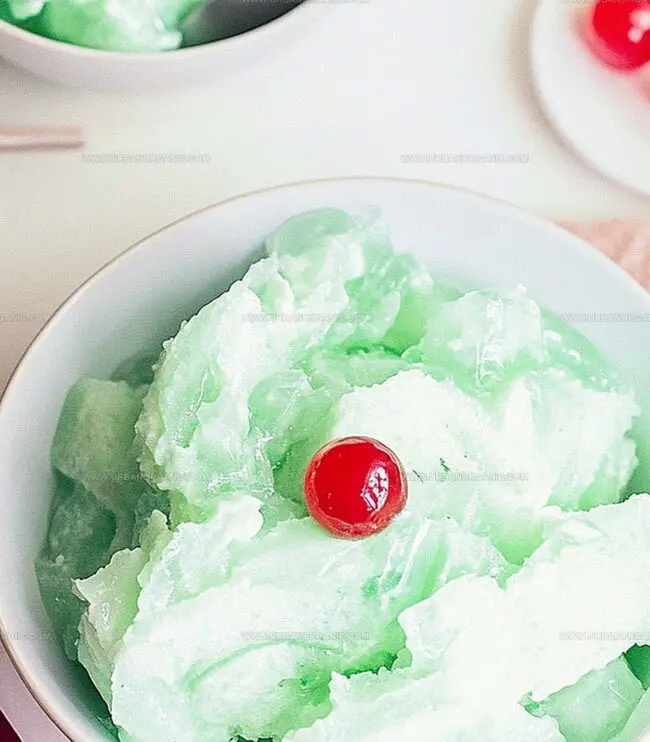
Before serving, garnish with extra whipped cream and maraschino cherries for a beautiful finishing touch.
Add-Ins to Make Green Jello Salad More Exciting
Serve This Salad at Holidays or Potlucks
Keep Green Jello Salad Chilled Until Serving
Print
Retro Green Jello Salad Recipe
- Total Time: 4 hours 15 minutes
- Yield: 9 1x
Description
Midwestern comfort shines through in this classic green jello salad, blending nostalgic flavors with creamy textures. Generations of family gatherings celebrate this sweet, playful dish that brings smiles and memories to your table.
Ingredients
- 1 box (170 g / 6 oz) lime Jell-O gelatin
- 1 cup (240 ml) boiling water
- 1 cup (240 ml) cold water
- 1 can (226 g / 8 oz) crushed pineapple, undrained
- 1 package (226 g / 8 oz) cream cheese, softened
- 1 cup (240 ml) whipped topping
- ½ cup (60 g) chopped walnuts or pecans (optional)
- ½ cup (50 g) mini marshmallows (optional)
- Extra whipped topping for garnish (optional)
- Maraschino cherries for garnish (optional)
Instructions
- Dissolve Preparation: Combine lime Jell-O with boiling water in a spacious mixing vessel, stirring until completely integrated, ensuring no granules remain.
- Liquid Fusion: Incorporate cold water and crushed pineapple with its natural juice, blending thoroughly to create a uniform mixture.
- Creamy Integration: Whip softened cream cheese until silky smooth, then seamlessly incorporate into the Jell-O base using a hand mixer to achieve a consistent, velvety texture.
- Initial Chilling: Refrigerate the concoction for 30-45 minutes, allowing it to slightly firm but not completely solidify, creating an ideal consistency for further additions.
- Final Assembly: Gently fold whipped topping into the slightly thickened mixture, optionally introducing chopped nuts or marshmallows for added complexity and textural interest.
- Molding and Setting: Transfer the mixture to a serving dish or decorative mold, then return to the refrigerator for a minimum of 4 hours to achieve complete gelatin transformation.
- Garnish and Serve: Just before presentation, embellish with an extra layer of whipped topping and scatter maraschino cherries for a festive and visually appealing finish.
Notes
- Carefully monitor chilling time to achieve the perfect semi-set texture before adding whipped topping, preventing a runny or overly firm result.
- Soften cream cheese completely and beat thoroughly to ensure a smooth, lump-free mixture that blends seamlessly with the Jell-O.
- Swap regular Jell-O with sugar-free versions for low-sugar diets, or use dairy-free cream cheese and whipped topping for lactose-intolerant guests.
- Experiment with different Jell-O flavors like strawberry or orange, or add fresh fruits like mandarin oranges for a unique twist on the classic recipe.
- Prep Time: 15 minutes
- Cook Time: 4 hours
- Category: Desserts, Snacks
- Method: Blending
- Cuisine: American
Nutrition
- Serving Size: 9
- Calories: 150
- Sugar: 18 g
- Sodium: 100 mg
- Fat: 5 g
- Saturated Fat: 3 g
- Unsaturated Fat: 1.5 g
- Trans Fat: 0 g
- Carbohydrates: 23 g
- Fiber: 1 g
- Protein: 2 g
- Cholesterol: 10 mg
Michael Thompson
Founder & Culinary Director
Expertise
Classical & Contemporary Cooking Techniques, Global Cuisine Appreciation, Nutrition & Menu Engineering, Sustainable Cooking Practices, Farm-to-Table Cuisine
Education
Southwestern Oregon Community College
Michael grew up in Oregon, where he learned early that food tastes better when it’s fresh, local, and made with care.
After earning his degree from the Southwestern Oregon Community College, he focused his career on teaching others how to cook with the seasons, reduce food waste, and reconnect with what’s on their plate.
Michael keeps his cooking simple, sustainable, and full of flavor. His favorite part of the process? Watching people realize how easy and satisfying it can be to cook a single great meal from scratch.