Peppermint Oreo Bark Recipe

Jolly Peppermint Oreo Bark Recipe: A Holiday Treat Magic

Sweet dreams start with this mouthwatering peppermint oreo bark that combines classic cookie crunch with festive winter magic.

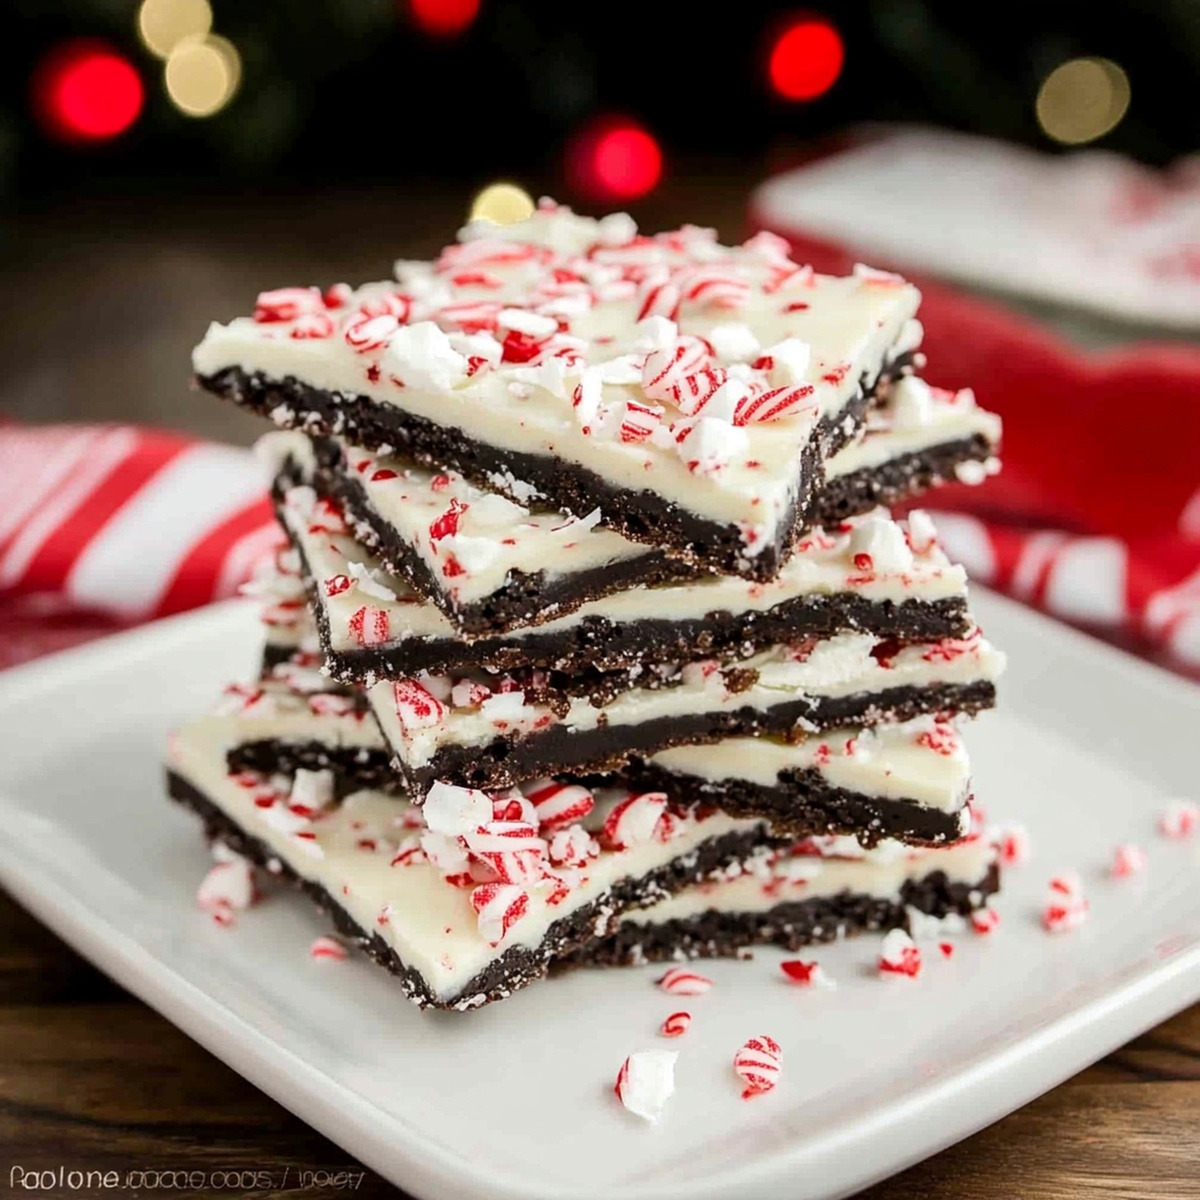
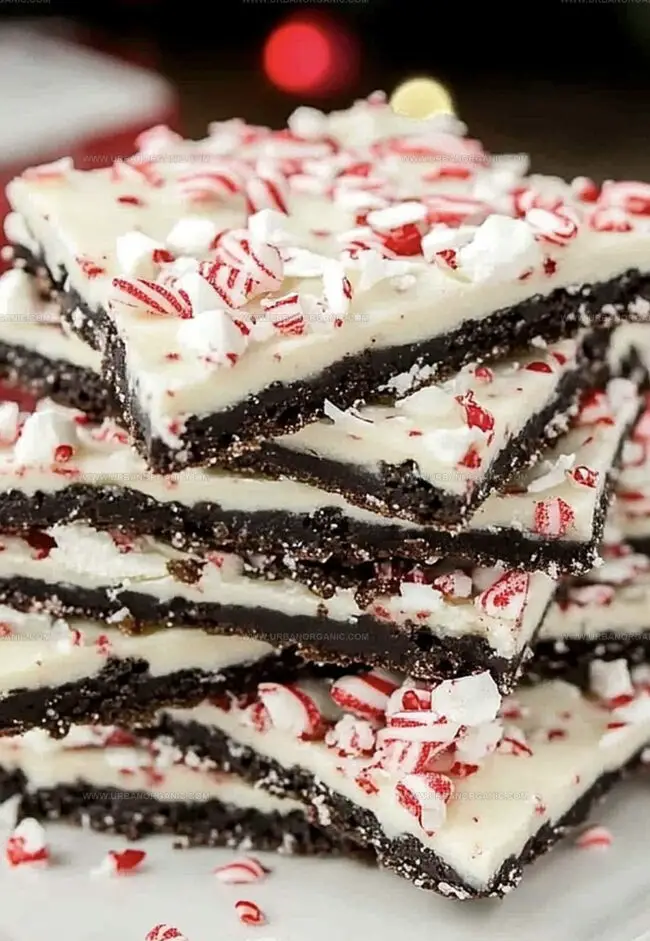
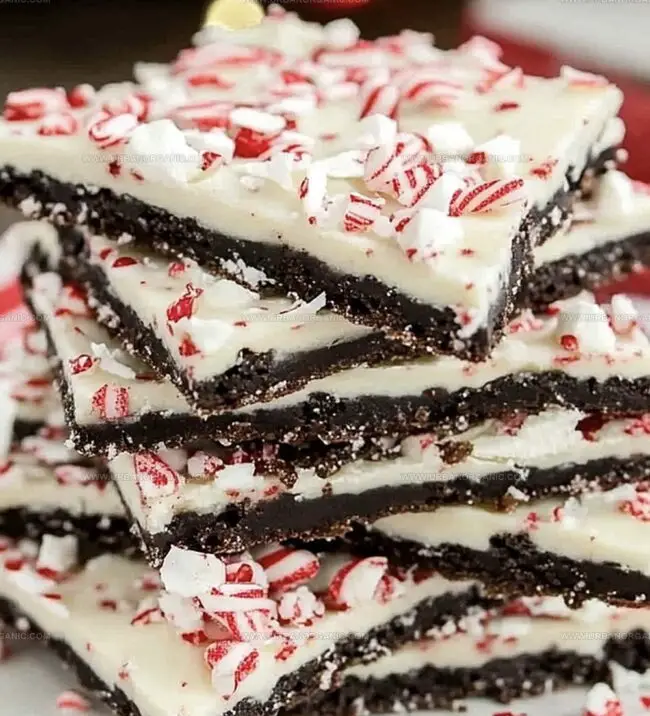
Candy cane pieces dance across a smooth chocolate landscape, creating an irresistible treat.

Chocolate lovers will swoon over the delightful combination of rich dark chocolate and crisp oreo cookies.

Minimal ingredients mean maximum flavor in this simple yet impressive dessert.

Crushing oreos releases their signature cream filling, which perfectly complements the cool peppermint notes.

Home bakers can whip up this showstopping confection in mere minutes with basic kitchen tools.

Chill, break, and savor every delectable bite of this crowd-pleasing holiday sensation.

What Makes Peppermint Oreo Bark Recipe Special

  • Personalize this peppermint bark with your favorite Oreo flavors or extra toppings for a unique dessert experience.
  • Requiring just a few simple steps and basic ingredients, this recipe delivers impressive results without complex cooking techniques.
  • Ideal for holiday gatherings, cookie exchanges, or gifting, this bark offers a delightful mix of chocolate, peppermint, and crunchy Oreo textures that everyone will love.
  • From start to finish, this recipe takes less than 30 minutes of active time, making it a quick and stress-free dessert option for busy home bakers.

What You Need for Peppermint Oreo Bark

Chocolate Base:
  • Dark Chocolate Chips, Milk Chocolate Chips: Rich base that creates smooth, sweet foundation for the bark with deep chocolate flavor. Best quality chocolate recommended for better taste.
  • White Chocolate Chips: Alternative option for lighter colored bark, offers creamy texture and sweet backdrop.
Flavor Enhancers:
  • Peppermint Extract: Adds bright, cool mint flavor that complements chocolate. Pure extract preferred over artificial versions.
  • Peppermint Candies: Provides crunchy texture and additional peppermint burst. Candy canes or soft mints work well.
Crunch and Texture Elements:
  • Oreo Cookies, Crushed Oreo Cookies: Adds delightful cookie crunch and classic sandwich cookie taste. Regular or mint-filled Oreos can be used.

How to Make Peppermint Oreo Bark at Home

Step 1: Prepare Chocolate Canvas

  • Line a baking sheet with parchment paper
  • Ensure the entire surface is covered smoothly

Step 2: Transform Chocolate into Liquid Gold

  • Place chocolate chips in a microwave-safe bowl
  • Melt chocolate in short 20-second bursts
  • Stir between each interval until silky and glossy
  • Alternative method: Use double boiler for gentle melting

Step 3: Infuse Flavor and Texture

  • Gently blend peppermint extract into melted chocolate
  • Chop Oreo cookies into chunky pieces
  • Fold most Oreo pieces into chocolate mixture
  • Keep a few pieces aside for topping

Step 4: Create Chocolate Masterpiece

  • Pour chocolate mixture onto prepared baking sheet
  • Spread evenly using a flexible spatula
  • Ensure uniform thickness across the surface

Step 5: Decorate with Festive Touches

  • Crush peppermint candies into small fragments
  • Sprinkle reserved Oreo pieces on top
  • Scatter crushed peppermint candies generously
  • Gently press toppings into chocolate layer

Step 6: Allow Bark to Solidify

  • Let bark cool at room temperature
  • Wait 1-2 hours for natural setting
  • For quicker results, refrigerate for 20-30 minutes

Step 7: Break and Celebrate

  • Once chocolate is completely firm
  • Break bark into irregular, rustic pieces
  • Serve and enjoy your delectable creation

Tips for the Best Peppermint Oreo Bark Ever

  • Smooth Melting Magic: Use short, gentle microwave bursts to prevent chocolate from burning, stirring between each interval for silky-smooth results.
  • Chill for Quick Set: Refrigerate the bark to speed up hardening time, ensuring a crisp, clean break when you're ready to enjoy.
  • Customize Candy Crunch: Experiment with different crushed candies or sprinkles to create unique flavor combinations and festive looks.
  • Prevent Sticking Tricks: Use parchment paper with slight overhang for easy lifting and clean removal of the entire bark from the baking sheet.
  • Storage Savvy Tip: Keep bark in an airtight container at room temperature for up to a week, or refrigerate for extended freshness.

Peppermint Oreo Bark Storage Instructions

  • Store the peppermint Oreo bark in an airtight container in the refrigerator for up to 2 weeks, keeping it away from strong-smelling foods to preserve its delicate flavor.
  • Place parchment paper between bark layers to prevent sticking and maintain the chocolate's pristine texture when storing multiple pieces.
  • Wrap the bark tightly in plastic wrap, then aluminum foil, and freeze for up to 3 months for longer preservation, ensuring minimal moisture exposure.
  • Remove from freezer and let the bark slowly thaw in the refrigerator for several hours before serving to maintain its original crisp texture and prevent condensation.

What Goes with Peppermint Oreo Bark Recipe

  • Pair this peppermint Oreo bark with a creamy hot chocolate topped with marshmallows for a decadent winter treat that warms your soul.
  • Serve alongside a peppermint mocha from your favorite coffee shop, letting the flavors dance between the sweet bark and rich espresso.
  • Match with a smooth vanilla bean ice cream to create a delightful contrast between the crunchy bark and silky cold cream.
  • Select a sweet dessert wine like moscato or port, which will highlight the chocolate's richness and complement the peppermint's cool undertones.

Cool Peppermint Oreo Bark Twists

  • Gluten-Free Oreo Bark: Swap regular Oreos with gluten-free chocolate sandwich cookies, ensuring all ingredients are certified gluten-free for those with wheat sensitivities.
  • Dairy-Free Chocolate Version: Use dairy-free dark chocolate chips and vegan chocolate sandwich cookies to create a plant-based friendly treat that everyone can enjoy.
  • Low-Sugar Alternative: Replace standard chocolate chips with sugar-free chocolate and use stevia-sweetened sandwich cookies to reduce overall sugar content while maintaining delicious flavor.
  • Nut-Free Holiday Bark: Skip traditional peppermint candies and use white chocolate drizzle or colorful sprinkles as a festive topping for individuals with nut allergies.

Peppermint Oreo Bark Recipe Q&A

  • Why use peppermint extract in this bark recipe?

Peppermint extract adds a refreshing, cool flavor that complements the chocolate and creates a festive holiday taste without overwhelming the other ingredients.

  • Can I use different types of chocolate for this bark?

Yes, you can substitute dark, milk, or white chocolate based on your preference. Just ensure the chocolate melts smoothly and has good quality for the best results.

  • How finely should I crush the Oreos and peppermint candies?

Aim for a mix of small and medium-sized pieces. Some chunky bits add texture, while smaller crumbs help distribute flavor evenly throughout the bark.

  • Is this recipe kid-friendly to make?

Absolutely! Kids can help with crushing Oreos, sprinkling toppings, and watching the chocolate melt. Just supervise during the melting and spreading stages for safety.

Print
clock clock iconcutlery cutlery iconflag flag iconfolder folder iconinstagram instagram iconpinterest pinterest iconfacebook facebook iconprint print iconsquares squares iconheart heart iconheart solid heart solid icon
Peppermint Oreo Bark Recipe

Peppermint Oreo Bark Recipe


5 Stars 4 Stars 3 Stars 2 Stars 1 Star

4.9 from 39 reviews

  • Total Time: 1 hour 10 minutes
  • Yield: 12 1x

Description

Cool peppermint oreo bark creates delightful holiday magic with crushed cookies and melted chocolate. Sweet layers of creamy white chocolate and crunchy peppermint pieces invite you to savor seasonal cheer.


Ingredients

Scale

Main Ingredients:

  • 16 ounces (454 grams) semi-sweet or white chocolate chips (or almond bark)
  • 12 Oreo cookies, roughly chopped
  • ½ cup (120 milliliters) crushed peppermint candies or candy canes

Flavor Enhancers:

  • ½ teaspoon (2.5 milliliters) peppermint extract

Optional Toppings:

  • Extra Oreo pieces
  • Extra crushed peppermint candies

Instructions

  1. Protect your work surface by draping parchment paper across a rimmed baking tray, ensuring complete coverage with slight overhang for easy lifting.
  2. Create a smooth chocolate base by gently melting dark or white chocolate chips in a microwave, stirring every 20 seconds to prevent scorching and maintain a glossy consistency.
  3. Enhance the chocolate’s flavor profile by carefully incorporating peppermint extract, stirring until the aromatic essence is uniformly distributed throughout the melted chocolate.
  4. Introduce textural intrigue by delicately folding roughly chopped Oreo cookies into the chocolate mixture, reserving a handful for decorative garnishing.
  5. Carefully spread the chocolate-Oreo blend across the prepared parchment, using a flexible spatula to achieve an even, consistent layer with gentle, sweeping motions.
  6. Artfully scatter crushed peppermint candies and remaining Oreo fragments across the surface, pressing them lightly to ensure they adhere to the still-malleable chocolate.
  7. Allow the confection to solidify naturally at room temperature for approximately 90 minutes, or expedite the process by placing the tray in the refrigerator for 25-35 minutes until completely firm.
  8. Once set, fracture the bark into irregular, rustic pieces using your hands, creating an appealing, handcrafted dessert ready for immediate indulgence.

Notes

  • Cooling Strategy: Chill the baking sheet before spreading chocolate to help it set faster and create a smoother surface.
  • Texture Enhancement: Crush Oreos into varying sizes for a more interesting crunch and visual appeal in the bark.
  • Dietary Modification: Swap regular chocolate chips with dairy-free or vegan chocolate alternatives for those with dietary restrictions.
  • Flavor Customization: Experiment with different extract intensities or substitute peppermint with vanilla or almond extract for unique variations.
  • Prep Time: 10 minutes
  • Cook Time: 1 hour
  • Category: Desserts, Snacks
  • Method: Baking
  • Cuisine: American

Nutrition

  • Serving Size: 12
  • Calories: 196
  • Sugar: 17 g
  • Sodium: 45 mg
  • Fat: 10 g
  • Saturated Fat: 6 g
  • Unsaturated Fat: 4 g
  • Trans Fat: 0 g
  • Carbohydrates: 25 g
  • Fiber: 1 g
  • Protein: 2 g
  • Cholesterol: 3 mg
Jessica Martinez

Jessica Martinez

Pastry Chef & Recipe Developer

Expertise

Organic Baking Techniques, Gluten-Free Recipe Development, Southwestern Dessert Specialties, Food Styling and Photography

Education

Santa Fe Community College (SFCC)

  • Program: Certificate in Patisserie
  • Focus: Cultivating disciplined kitchen preparation for a safe, organized, and sanitary workstation; mastering the timely production of nutritious, visually appealing pastries; safely operating standard pastry equipment; and honing core patissier techniques for professional pastry work.

Jessica brings the sweet side to Urban Organic with her passion for baking and love for the Southwest. She trained at Santa Fe Community College and has built a career creating beautiful, gluten-free, and organic desserts that feel both nostalgic and new.

She believes baking should be fun, creative, and open to everyone, no matter your diet or skill level. Jessica’s recipes are simple enough to follow, but special enough to remember.

Leave a Reply

Your email address will not be published. Required fields are marked *

Recipe rating 5 Stars 4 Stars 3 Stars 2 Stars 1 Star