No-Bake Cheesecake Parfait with Cherry Pie Filling Recipe

Sweet Cherry Pie No-Bake Cheesecake Parfait Recipe for Dessert Lovers

Dessert enthusiasts absolutely adore this no-bake cheesecake parfait with cherry pie filling that brings creamy elegance to any gathering.

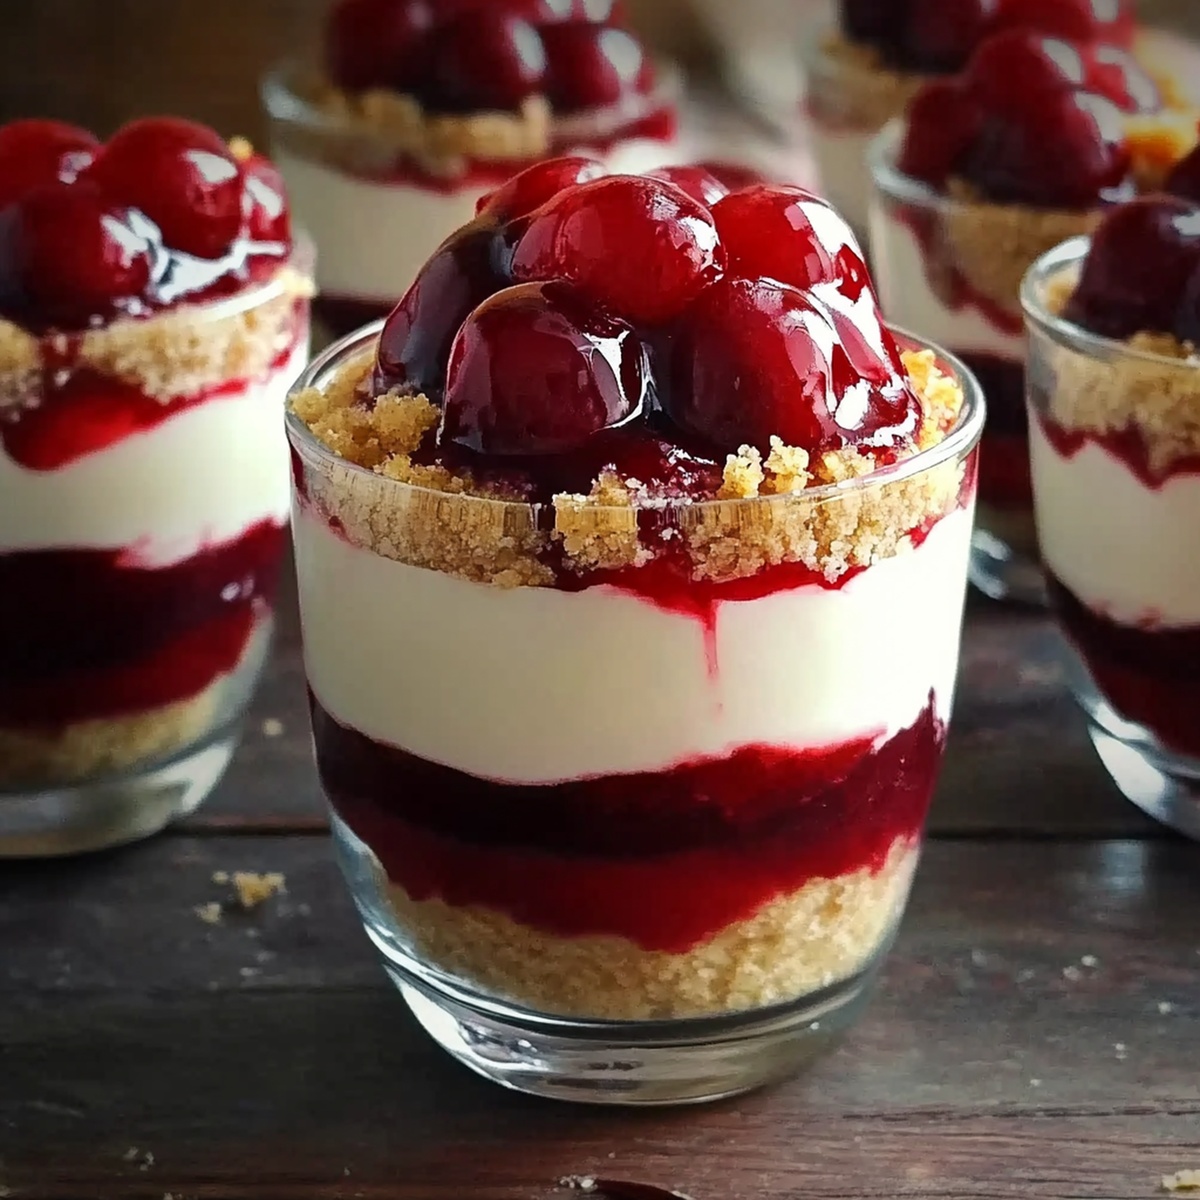
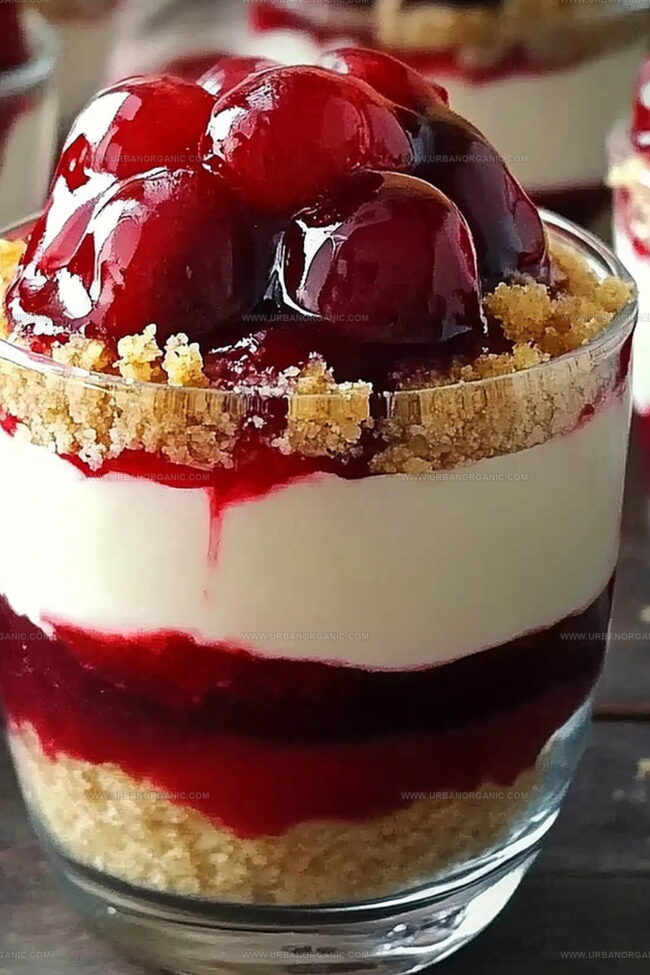
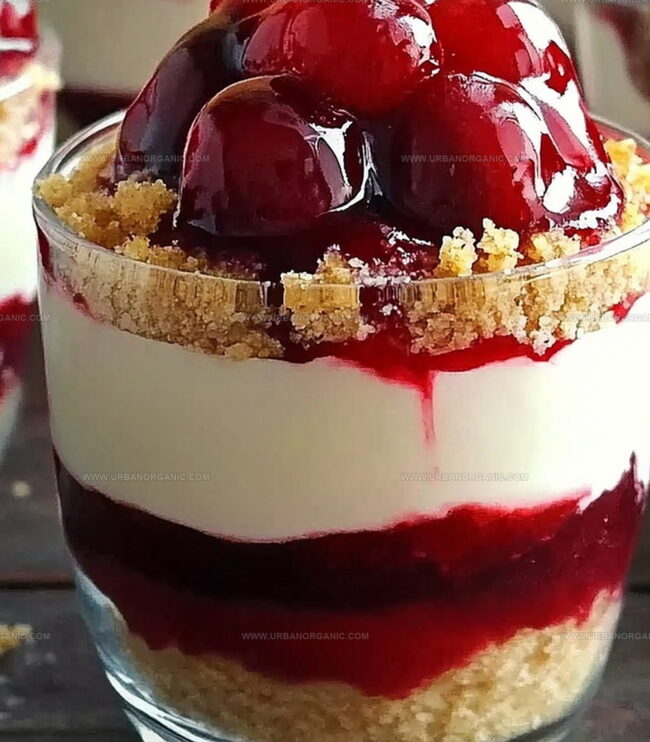
Layers of smooth cream cheese blend beautifully with sweet cherry goodness.

Chilled and delightful, each spoonful promises pure indulgence without turning on the oven.

Minimal effort meets maximum flavor in this simple yet impressive treat.

Cool and refreshing, the parfait delivers restaurant-quality dessert right from your kitchen.

Guests will marvel at how quickly you can create such a stunning sweet finale.

Dive in and savor every delectable moment of this irresistible dessert.

Cherry Pie-Filled Cheesecake Parfaits Worth Every Layer

  • No-fuss preparation takes just 15 minutes, making this parfait a lifesaver for busy home cooks.
  • Layers of creamy cheesecake and sweet cherry filling create a visually stunning dessert that impresses guests and family alike.
  • Perfect for summer gatherings, potlucks, or casual dinner parties with its make-ahead convenience and elegant presentation.
  • Requires zero oven time, ideal for hot days or when you want a delicious dessert without heating up the kitchen.

Ingredients to Build a No-Bake Cheesecake Parfait with Cherry Pie Filling

Crust Base:
  • Graham Cracker Crumbs: Classic cookie base with sweet, crumbly texture for a delicious foundation.
  • Butter, Melted: Rich ingredient that helps bind the crumbs and create a firm crust.
  • Sugar: Adds subtle sweetness to enhance the graham cracker layer.
Cream Cheese Filling:
  • Cream Cheese: Rich, smooth base that gives the parfait its classic tangy cheesecake flavor. Best when softened at room temperature.
  • Powdered Sugar: Creates silky smooth sweetness and helps stabilize the filling.
  • Vanilla Extract: Adds warm, classic flavor that complements the cream cheese.
  • Heavy Cream: Provides light, airy texture when whipped. Look for high-fat content cream for best results.
Topping and Garnish:
  • Cherry Pie Filling: Sweet, vibrant topping that adds fruity contrast. Canned or homemade varieties work well.
  • Whipped Cream: Light, airy garnish for extra indulgence. Can be homemade or store-bought.
  • White Chocolate Shavings: Optional decorative element that adds elegant touch and extra sweetness.
  • Crushed Graham Crackers: Additional garnish for texture and visual appeal.

Assembling No-Bake Cheesecake Parfaits from Start to Finish

Step 1: Crush the Graham Base

  • Grab graham crackers and crush them into fine crumbs
  • Melt butter in a separate bowl
  • Mix cracker crumbs with butter and sugar
  • Press mixture into the bottom of serving glasses

Create a compact layer that will hold the parfait together

Step 2: Whip the Creamy Filling

  • Take cream cheese and bring to room temperature
  • Beat cream cheese until completely smooth
  • Add powdered sugar and vanilla extract
  • Whip heavy cream in a separate bowl until soft peaks form
  • Gently fold whipped cream into cream cheese mixture

Ensure the mixture is light and fluffy

Step 3: Layer the Parfait Magic

  • Spoon cream cheese mixture over graham cracker base
  • Add generous layer of cherry pie filling
  • Create multiple layers if desired
  • End with a beautiful topping of cherry filling

Step 4: Chill and Decorate

  • Refrigerate parfaits for minimum 30 minutes
  • Before serving, add optional garnishes
Optional decorations:
  • Whipped cream swirls
  • Crushed graham crackers
  • White chocolate shavings

Serve chilled and enjoy the creamy, fruity dessert!

Tips for Assembling Cherry Cheesecake Parfaits with Ease

  • Customize Crumb Base: Swap graham crackers with alternative cookies like Oreos or digestive biscuits for a unique flavor twist.
  • Smooth Cheesecake Technique: Use room temperature cream cheese to prevent lumps and ensure a silky, creamy texture.
  • Lighter Dairy Option: Substitute full-fat cream cheese with reduced-fat or Greek yogurt for a healthier version without compromising taste.
  • Make-Ahead Magic: Prepare parfaits up to 24 hours in advance, keeping them covered in the refrigerator for convenient entertaining.
  • Fruit Flexibility: Replace cherry pie filling with fresh seasonal berries or other fruit compotes for varied flavor profiles.

How to Keep No-Bake Cheesecake Parfaits Fresh

  • Store leftover parfaits in an airtight container in the refrigerator for up to 3 days, keeping them fresh and delicious.
  • Cover the tops with plastic wrap to prevent any freezer odors from seeping into the dessert.
  • Remove parfaits from the refrigerator 10-15 minutes before serving to soften slightly and enhance flavor.
  • Avoid freezing these parfaits, as the texture of whipped cream and fresh ingredients will become watery and lose their creamy consistency.

Drinks and Snacks That Pair Well with Cherry Cheesecake Parfaits

  • Pair this sweet and creamy cheesecake parfait with a crisp Moscato or a light Riesling, which will complement the cherry's tartness and balance the dessert's richness.
  • Sip on a classic Old Fashioned or a cherry-infused bourbon cocktail that echoes the cherry pie filling's deep fruity notes and cuts through the cheesecake's creamy texture.
  • Enjoy a sparkling rosé or prosecco that adds effervescence and lightness, creating a delightful contrast with the dense cheesecake layer and enhancing the dessert's overall flavor profile.
  • Serve alongside a smooth vanilla latte or a rich espresso, which provides a robust counterpoint to the sweet cherry and creamy cheesecake, creating a harmonious dessert experience.

Makeover Ideas for No-Bake Cheesecake Parfaits

  • Gluten-Free Paradise: Replace graham cracker crumbs with gluten-free cookie crumbs or almond flour for a celiac-friendly version that maintains the same delicious texture.
  • Vegan Dream: Swap cream cheese with cashew-based cream cheese, use coconut whipped cream, and choose plant-based butter for an entirely dairy-free dessert that's equally creamy.
  • Low-Sugar Option: Substitute powdered sugar with stevia or monk fruit sweetener, and use sugar-free cherry pie filling to create a diabetes-friendly parfait with reduced calories.
  • Fruity Alternative: Replace cherry pie filling with fresh mixed berries, blueberry compote, or raspberry sauce for a seasonal and lighter fruit-based dessert that adds vibrant color and natural sweetness.

Answering Your Questions on Cheesecake Parfaits

  • Can I make this recipe ahead of time?

Yes, you can prepare these parfaits up to 2 days in advance. Keep them covered in the refrigerator and add any fresh garnishes just before serving.

  • Is it possible to use a different fruit filling?

Absolutely! You can swap cherry pie filling with strawberry, blueberry, or raspberry pie filling for a delicious variation.

  • Do I need any special equipment to make these parfaits?

No special equipment is required. You just need a mixing bowl, electric mixer, and serving glasses or parfait cups.

  • Can I make this recipe gluten-free?

Yes, simply use gluten-free graham crackers for the crust layer to make the entire dessert gluten-free.

Print
clock clock iconcutlery cutlery iconflag flag iconfolder folder iconinstagram instagram iconpinterest pinterest iconfacebook facebook iconprint print iconsquares squares iconheart heart iconheart solid heart solid icon
No-Bake Cheesecake Parfait with Cherry Pie Filling Recipe

No-Bake Cheesecake Parfait with Cherry Pie Filling Recipe


5 Stars 4 Stars 3 Stars 2 Stars 1 Star

4.6 from 30 reviews

  • Total Time: 40 minutes
  • Yield: 4 1x

Description

Sweet layers of creamy no-bake cheesecake parfait dance alongside luscious cherry pie filling, creating a dessert that delights with minimal effort. Rich, silky textures and bold fruit flavors invite you to savor each spoonful of this elegant, effortless treat.


Ingredients

Scale

Primary Ingredients:

  • 8 ounces (226 grams) cream cheese, softened
  • 1 can (21 ounces or 595 grams) cherry pie filling
  • 1 cup (240 milliliters) heavy whipping cream, cold

Crust and Sweetening Ingredients:

  • 1 cup (100 grams) graham cracker crumbs
  • ½ cup (60 grams) powdered sugar
  • 2 tablespoons (30 milliliters) melted butter
  • 1 tablespoon (12.5 grams) sugar

Flavoring and Garnish Ingredients:

  • 1 teaspoon (5 milliliters) vanilla extract
  • Whipped cream (optional)
  • Crushed graham crackers or white chocolate shavings (for garnish)

Instructions

  1. Prepare the graham cracker foundation by blending crumbs with melted butter and sugar until achieving a consistent texture.
  2. Distribute the crumb mixture evenly across serving glasses, gently compacting to create a solid base layer.
  3. Whip cream cheese with powdered sugar and vanilla extract until achieving a velvety, lump-free consistency.
  4. Separately whisk heavy cream until it develops soft, billowy peaks.
  5. Delicately incorporate whipped cream into the cream cheese mixture, creating a light and airy filling.
  6. Carefully layer the creamy cheesecake mixture over the graham cracker foundation in each glass.
  7. Generously spread cherry pie filling atop the cheesecake layer, ensuring even distribution.
  8. Optional: Create additional layers by repeating the cheesecake and cherry filling sequence.
  9. Refrigerate the parfaits for a minimum of 30 minutes to allow flavors to meld and texture to set.
  10. Before serving, enhance presentation by garnishing with optional toppings like fresh whipped cream, crushed graham cracker crumbs, or delicate white chocolate shavings.

Notes

  • Swap graham crackers with gluten-free alternatives like almond flour or gluten-free cookie crumbs for a celiac-friendly version.
  • Reduce sugar content by using Greek yogurt instead of full-fat cream cheese or choosing low-sugar pie filling for a lighter dessert.
  • Allow cream cheese to soften at room temperature for 30 minutes to prevent lumpy texture when mixing, ensuring a silky smooth cheesecake layer.
  • Make parfaits ahead of time and store in the refrigerator for up to 2 days, keeping the crust layer crisp by adding it just before serving.
  • Prep Time: 10 minutes
  • Cook Time: 30 minutes
  • Category: Desserts, Snacks
  • Method: Blending
  • Cuisine: American

Nutrition

  • Serving Size: 4
  • Calories: 135
  • Sugar: 9 g
  • Sodium: 50 mg
  • Fat: 7 g
  • Saturated Fat: 4 g
  • Unsaturated Fat: 2 g
  • Trans Fat: 0 g
  • Carbohydrates: 16 g
  • Fiber: 1 g
  • Protein: 2 g
  • Cholesterol: 25 mg
Jessica Martinez

Jessica Martinez

Pastry Chef & Recipe Developer

Expertise

Organic Baking Techniques, Gluten-Free Recipe Development, Southwestern Dessert Specialties, Food Styling and Photography

Education

Santa Fe Community College (SFCC)

  • Program: Certificate in Patisserie
  • Focus: Cultivating disciplined kitchen preparation for a safe, organized, and sanitary workstation; mastering the timely production of nutritious, visually appealing pastries; safely operating standard pastry equipment; and honing core patissier techniques for professional pastry work.

Jessica brings the sweet side to Urban Organic with her passion for baking and love for the Southwest. She trained at Santa Fe Community College and has built a career creating beautiful, gluten-free, and organic desserts that feel both nostalgic and new.

She believes baking should be fun, creative, and open to everyone, no matter your diet or skill level. Jessica’s recipes are simple enough to follow, but special enough to remember.

Leave a Reply

Your email address will not be published. Required fields are marked *

Recipe rating 5 Stars 4 Stars 3 Stars 2 Stars 1 Star