
No-Bake Cherry Cheesecake Recipe Ever Created
My recent obsession with no bake cherry cheesecake surprised even my most adventurous dessert-loving friends.
Sweet cream cheese blends seamlessly with graham cracker crust in this magical summer treat.
Cool kitchen skills matter more than complicated techniques for crafting this delightful dessert.
Each creamy bite promises rich flavors without turning on a single oven dial.
Cherries add a vibrant pop of color and tangy sweetness that makes everyone smile.
Simple ingredients come together quickly, creating a stunning dessert that looks professionally prepared.
You’ll adore how effortlessly this recipe delivers maximum deliciousness with minimal effort.
Grab a fork and prepare for pure cheesecake bliss that will have everyone asking for your secret.
Why No-Bake Cherry Cheesecake Is a Quick Dessert Win
What You’ll Need to Build This No-Bake Cheesecake
Base Ingredients:Crust Notes: Graham crackers add traditional cheesecake base flavor, unsalted butter recommended.
Filling Ingredients:Filling Notes: Full-fat cream cheese recommended for best results, room temperature ensures smooth mixing.
Cream and Topping Ingredients:Cream and Topping Notes: Ensure heavy cream is cold for best whipping results, canned cherry filling offers convenient topping option.
How to Layer and Chill This Cherry Treat
Step 1: Create Crunchy Crust
Grab a mixing bowl and combine:Press the mixture firmly into the bottom of a 9-inch pie dish or springform pan. Pop it in the refrigerator for 15 minutes to set while you prepare the filling.
Step 2: Whip Creamy Filling
In a large mixing bowl, blend:Beat these ingredients until they transform into a silky, smooth mixture.
Step 3: Fluff the Cream
In a separate bowl, whip heavy cream until it forms beautiful, stiff peaks. Gently fold this fluffy cream into the cream cheese mixture, creating a light and airy filling.
Step 4: Layer the Cheesecake
Spread the creamy filling evenly over the chilled crust. Cover the dish and refrigerate for a minimum of 4 hours, or ideally overnight, to allow the cheesecake to set perfectly.
Step 5: Crown with Cherry Topping
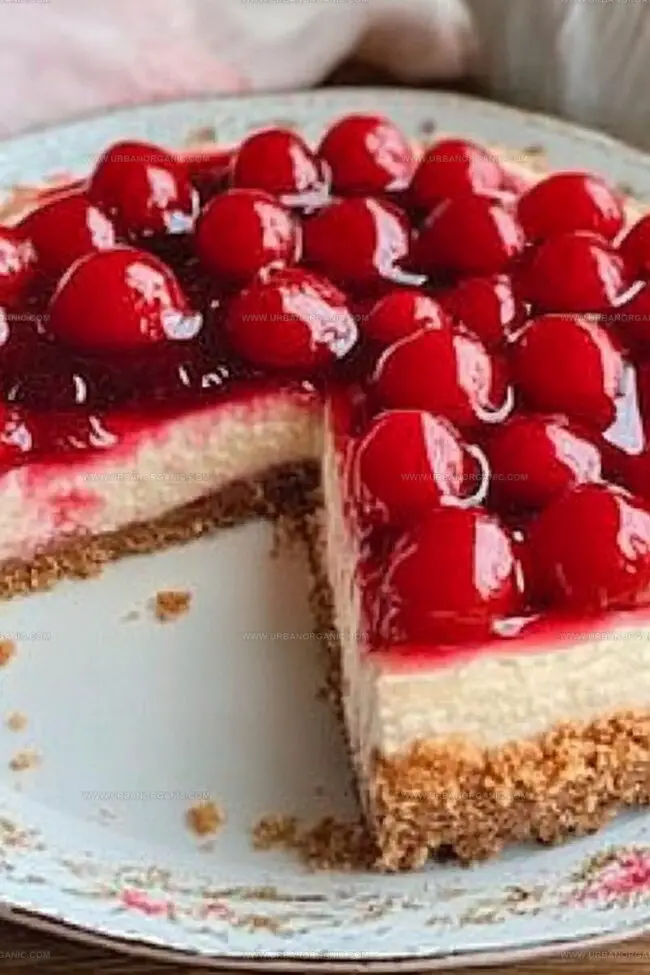
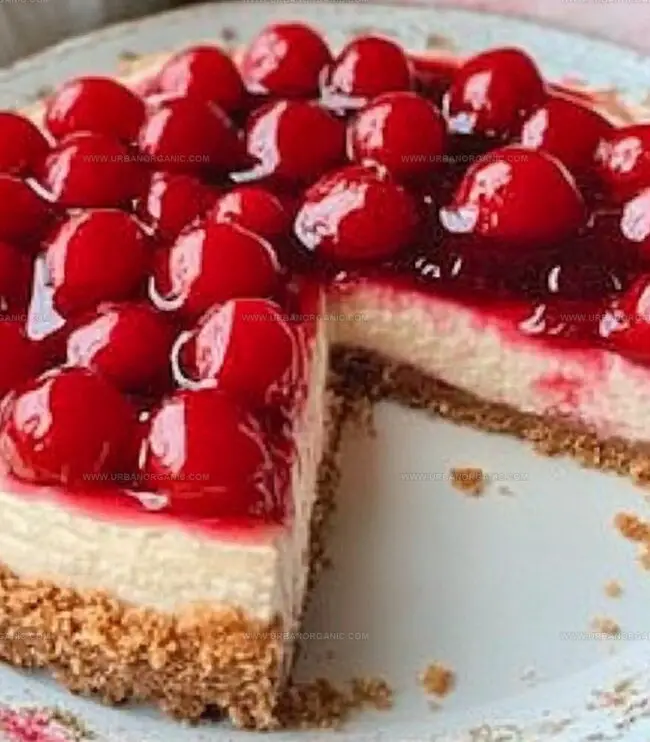
Once the cheesecake has set, generously spread cherry pie filling across the top, creating a vibrant and delicious finish.
Serve chilled and enjoy this delightful dessert!
Pro Tips for a Smooth Filling and Tangy Top
Best Way to Store and Slice No-Bake Cheesecake
Desserts and Drinks That Match This Treat
Twist This Recipe with Berry or Chocolate Variations
FAQs for No Bake Cherry Cheesecake Recipe
Graham cracker crumbs are the classic choice, providing a sweet and crunchy base that perfectly complements the creamy filling. You can also use digestive biscuits or crushed vanilla cookies as alternatives if graham crackers aren’t available.
Make sure to use full-fat cream cheese at room temperature and whip the heavy cream to stiff peaks. Chilling the cheesecake for at least 4 hours allows it to set properly and maintain a firm, creamy texture.
Yes! This no-bake cheesecake is perfect for preparing in advance. You can make it a day or two before serving, which actually helps the flavors meld together and improves the overall taste and texture.
While a springform pan makes removing the cheesecake easier, you can also use a regular pie dish. If using a regular dish, line it with parchment paper for easier serving and cleaner slices.
Print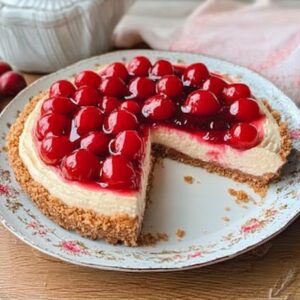
No Bake Cherry Cheesecake Recipe
- Total Time: 4 hours 15 minutes
- Yield: 8 1x
Description
Creamy no bake cherry cheesecake delivers pure dessert bliss with graham cracker crust and luscious cherry topping. Sweet layers of cool cream cheese and tangy cherries promise delightful moments that dance across your palate, inviting pure indulgence.
Ingredients
Dairy Products:
- 16 ounces (2 blocks/454 grams) cream cheese, softened
- 1 cup (237 milliliters) heavy whipping cream
- ¾ cup (170 grams) powdered sugar
Crust Ingredients:
- 1 ½ cups (180 grams) graham cracker crumbs
- ⅓ cup (76 grams) melted butter
- 2 tablespoons (25 grams) sugar
Topping:
- 1 can (21 ounces/595 grams) cherry pie filling
- 1 teaspoon vanilla extract
Instructions
- Crush graham crackers into fine particles, then amalgamate with melted butter and sugar, creating a cohesive mixture that firmly compresses into the base of a 9-inch pie dish, ensuring an even, compact foundation.
- Allow the crust to solidify in the refrigerator for approximately 15 minutes while preparing the luxurious filling.
- Utilize an electric mixer to transform cream cheese into a silky, uniform texture, incorporating powdered sugar and vanilla extract until achieving a smooth, velvety consistency.
- In a separate vessel, whip heavy cream to stiff, billowing peaks that maintain their structural integrity when the whisk is lifted.
- Delicately integrate the whipped cream into the cream cheese mixture, using gentle folding motions to preserve the airy volume and create a harmonious blend.
- Distribute the creamy filling uniformly across the chilled crust, ensuring an even layer that reaches the edges of the dish.
- Encase the cheesecake and allow it to set in the refrigerator for a minimum of 4 hours, though overnight refrigeration will yield optimal texture and flavor development.
- Once the cheesecake has completely firmed, lavishly drape the surface with vibrant cherry pie filling, creating an enticing crimson topping that promises a burst of fruity sweetness.
Notes
- Swap graham crackers with gluten-free alternatives like almond flour or crushed gluten-free cookies for those with dietary restrictions.
- Use low-fat cream cheese and whipped cream to create a lighter version of this decadent dessert.
- Enhance flavor by adding a splash of almond extract or lemon zest to the cream cheese mixture for a subtle twist.
- Freeze individual slices for a cool summer treat that can be enjoyed straight from the freezer.
- Prep Time: 15 minutes
- Cook Time: 4 hours
- Category: Desserts, Snacks
- Method: None
- Cuisine: American
Nutrition
- Serving Size: 8
- Calories: 570
- Sugar: 1 g
- Sodium: 1200 mg
- Fat: 42 g
- Saturated Fat: 18 g
- Unsaturated Fat: 24 g
- Trans Fat: 1 g
- Carbohydrates: 4 g
- Fiber: 0 g
- Protein: 37 g
- Cholesterol: 130 mg
Jessica Martinez
Pastry Chef & Recipe Developer
Expertise
Organic Baking Techniques, Gluten-Free Recipe Development, Southwestern Dessert Specialties, Food Styling and Photography
Education
Santa Fe Community College (SFCC)
Jessica brings the sweet side to Urban Organic with her passion for baking and love for the Southwest. She trained at Santa Fe Community College and has built a career creating beautiful, gluten-free, and organic desserts that feel both nostalgic and new.
She believes baking should be fun, creative, and open to everyone, no matter your diet or skill level. Jessica’s recipes are simple enough to follow, but special enough to remember.