Moms Russian Tea Cookies Recipe

Mom’s Russian Tea Cookies Recipe: Sweet Homemade Treats

Nestled in my grandmother’s cherished russian tea cookies recipe lies a treasure of buttery, melt-in-your-mouth magic.

Delicate powdered sugar coats each crumbly bite like a gentle winter whisper.

My childhood memories dance with the sweet aroma of these delectable treats cooling on grandma’s kitchen counter.

Crisp and tender, these cookies carry generations of love wrapped in a simple, comforting embrace.

Soft wheat flour and rich butter create a nostalgic symphony that speaks directly to your soul.

Baking these cookies feels like a warm hug from the past, connecting you to moments of pure joy.

Moms Russian Tea Cookies That Melt in Your Mouth

  • Perfect for busy moms wanting to whip up delightful cookies without spending hours in the kitchen.
  • Requires only basic pantry staples like butter, flour, powdered sugar, and nuts, making it super convenient for spontaneous baking.
  • Simple rolling and coating technique allows children to help, turning cookie-making into a fun family activity that creates sweet memories and builds cooking skills.
  • Ideal for Christmas gatherings, winter celebrations, or as a comforting homemade gift that brings warmth and nostalgia to any occasion.

Everything Used in Moms Russian Tea Cookies

Base Ingredients:
  • Butter: Creamy base that provides rich flavor and tender texture for the cookies.
  • Powdered Sugar: Adds sweetness and creates a delicate, melt-in-your-mouth texture.
  • Vanilla Extract: Enhances overall flavor with warm, sweet aromatic notes.
Dry Ingredients:
  • All-Purpose Flour: Structural foundation for the cookie, creating a soft, crumbly texture.
  • Salt: Balances sweetness and enhances overall flavor profile.
Nutty Add-In:
  • Chopped Nuts: Adds crunch, depth of flavor, and interesting texture to the cookies. Pecans or walnuts work best for traditional Russian tea cookies.
Coating:
  • Powdered Sugar: Final dusting creates a classic snow-white appearance and extra sweetness. Use fresh, fine-quality powdered sugar for best coating results.

How to Make Moms Russian Tea Cookies Step-by-Step

Step 1: Whip Creamy Butter Base

  • Beat butter and powdered sugar until fluffy and light
  • Add vanilla extract for rich flavor
  • Gradually incorporate flour and salt
  • Mix ingredients until just combined
  • Gently fold in chopped nuts for delightful crunch
  • Cover dough and refrigerate for half an hour

Step 2: Shape Delicate Cookies

  • Heat oven to 350°F
  • Line baking sheet with parchment paper
  • Roll dough into small round balls
  • Space cookies evenly on baking sheet
  • Bake until edges turn golden and cookies set
  • Cooking time ranges between 12-15 minutes

Step 3: Create Powdery Snow Coating

  • Allow cookies to cool slightly for 5 minutes
  • Roll warm cookies in powdered sugar
  • Let cookies cool completely
  • Roll cookies again in powdered sugar
  • Ensure complete white coverage for classic snowball appearance

Tips for Shaping and Baking Russian Tea Cookies

  • Chill for Success: Refrigerate the dough for at least 30 minutes to prevent spreading and enhance the cookie's texture, ensuring a perfectly compact shape.
  • Roll with Precision: Use a light touch when forming 1-inch balls to keep the cookies tender and maintain their delicate snowball appearance.
  • Sugar Coating Trick: Roll the cookies in powdered sugar while they're still warm for the first coating, then again after cooling for a thick, beautiful white finish.
  • Nut Flexibility: Swap pecans or walnuts with almonds or hazelnuts to customize the flavor and suit personal preferences or dietary needs.
  • Storage Hack: Store cookies in an airtight container between layers of parchment paper to preserve their powdery texture and prevent sticking for up to a week.

Storing Moms Russian Tea Cookies the Right Way

  • Store cooled cookies in an airtight container for up to 5 days, placing parchment paper between layers to prevent sticking.
  • Wrap cookies tightly in plastic wrap, then place in a freezer-safe container. Freeze for up to 3 months for maximum freshness.
  • Remove frozen cookies from the freezer and let them sit at room temperature for 30 minutes before serving.
  • Dust with additional powdered sugar after reheating to restore their classic snowball appearance and powdery texture.

Pairing Tips for Moms Russian Tea Cookies

  • Complement the nutty, sweet cookies with a warm, aromatic chai that echoes the vanilla and nut flavors, creating a cozy winter afternoon treat.
  • Indulge in rich, creamy hot chocolate that balances the delicate, powdery texture of the Russian tea cookies, offering a comforting chocolate-vanilla combination.
  • Elevate the dessert experience by sipping a smooth coffee liqueur that highlights the buttery, nutty notes of the cookies, perfect for an after-dinner indulgence.
  • Cut through the sweetness with a bold, robust espresso that provides a sharp contrast to the soft, sugary cookie, awakening your taste buds.
  • Gluten-Free Delight: Replace wheat flour with almond flour or gluten-free all-purpose flour blend for a celiac-friendly version.
  • Vegan Nutty Cookies: Swap butter with coconut oil or vegan margarine, and use ground flaxseed as an egg replacement to create a plant-based treat.
  • Nut-Free Alternative: Eliminate chopped nuts and substitute with rolled oats or sunflower seeds for those with nut allergies while maintaining the cookie's delicate texture.
  • Low-Sugar Option: Use a sugar substitute like erythritol or monk fruit sweetener to reduce overall sugar content, perfect for diabetic-friendly diets.

Common Questions About Moms Russian Tea Cookies

  • What makes these cookies different from other cookies?

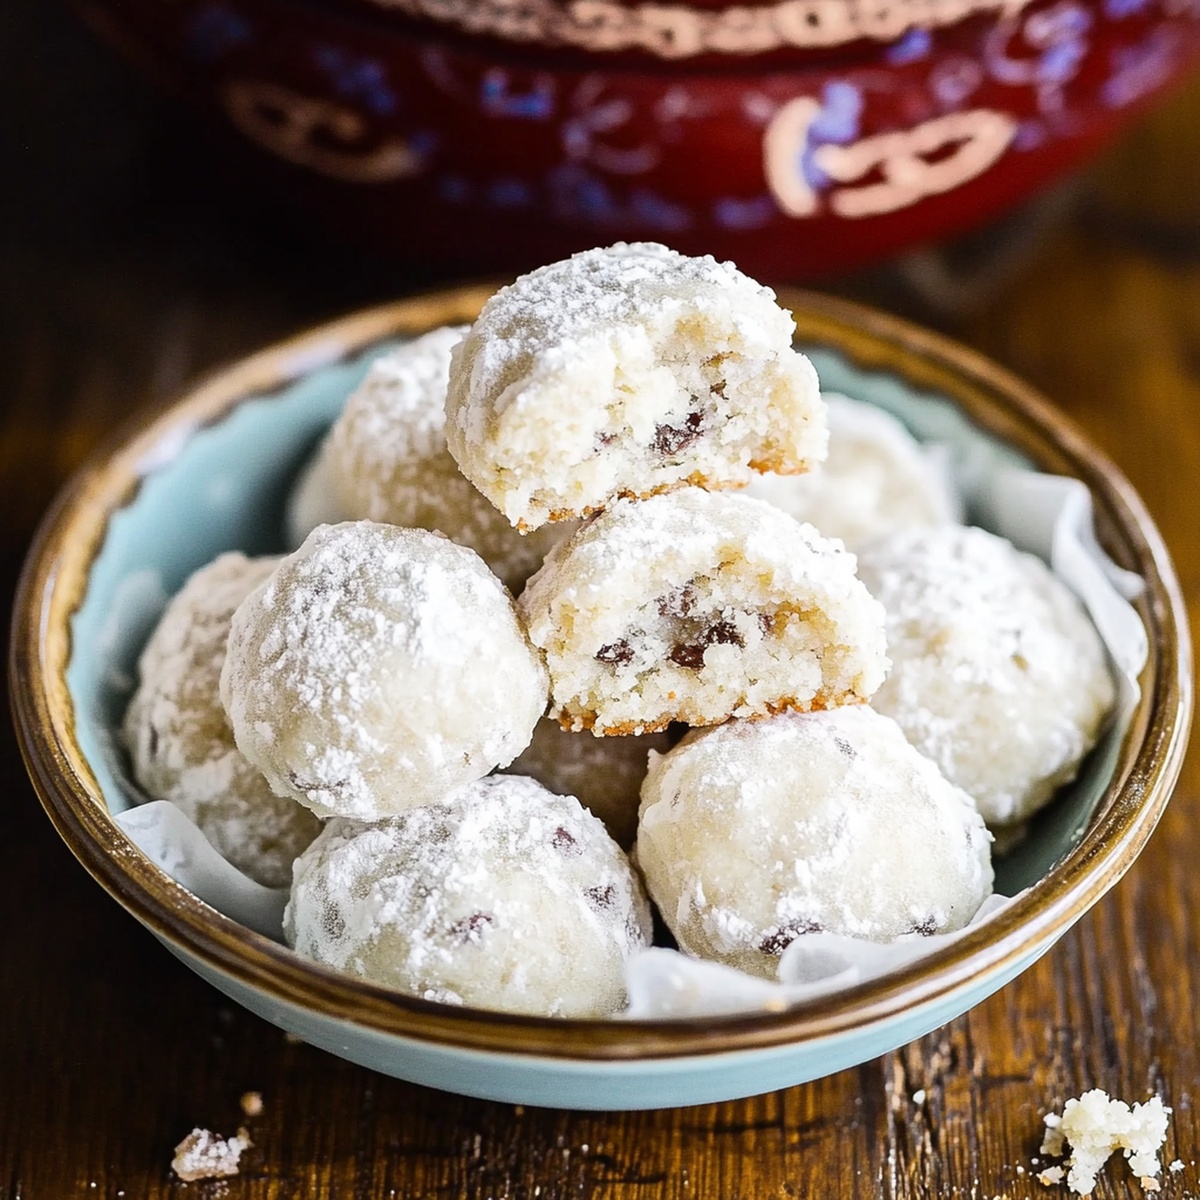
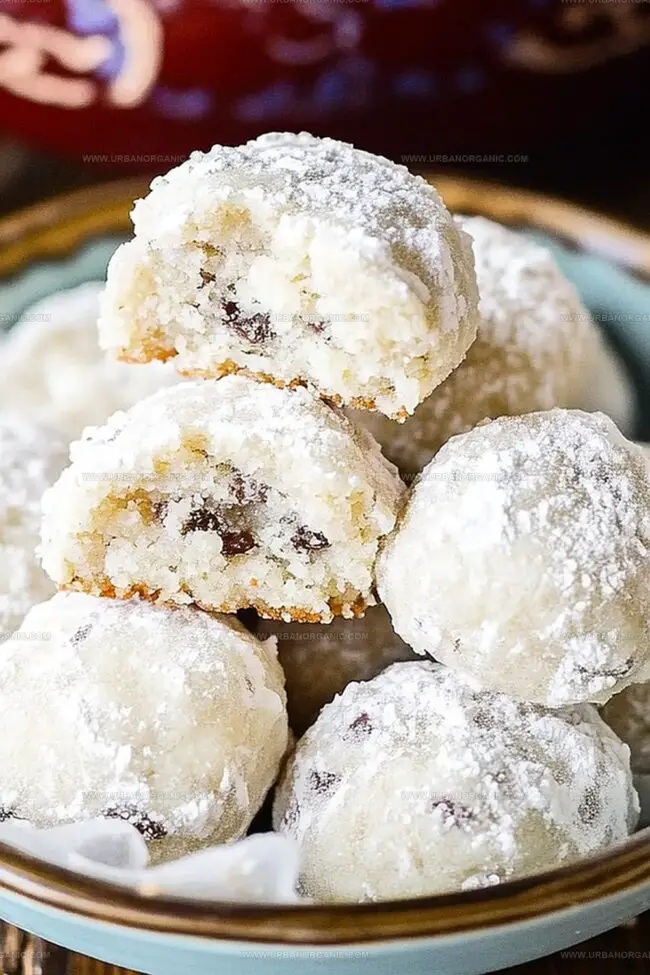
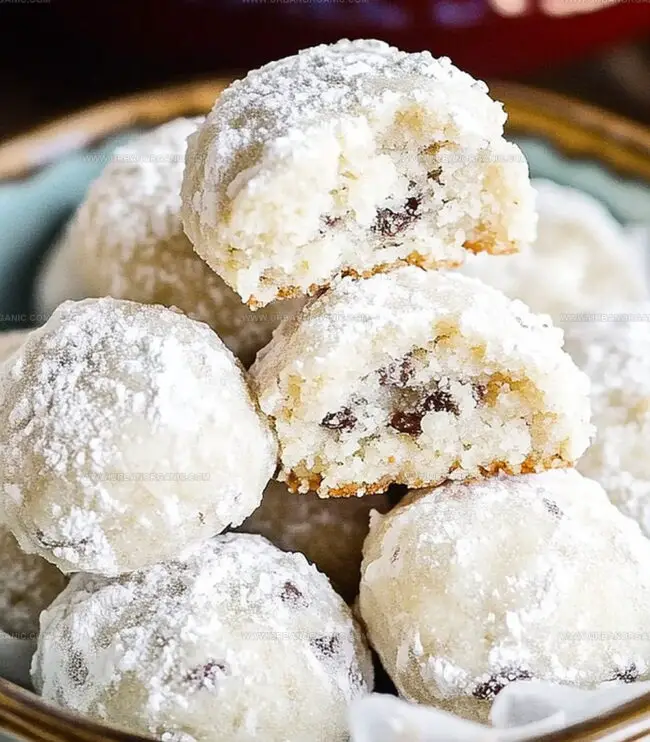
These Russian tea cookies are known for their delicate, melt-in-your-mouth texture and rich, buttery flavor with chopped nuts, giving them a unique crumbly and delicate consistency.

  • Do I need any special equipment to make these cookies?

No special equipment is needed. You’ll just require a mixing bowl, baking sheet, and basic baking tools like a mixer, measuring cups, and parchment paper.

  • Can I substitute the nuts if someone has an allergy?

Yes, you can replace the chopped nuts with finely ground rolled oats or additional flour to maintain the cookie’s texture. If avoiding nuts entirely, the cookie will still taste delicious.

  • How do I know when the cookies are perfectly baked?

The cookies are done when they are set and lightly golden on the bottom. They should look pale on top but firm when touched, typically after 12-15 minutes of baking at 350°F.

Print
clock clock iconcutlery cutlery iconflag flag iconfolder folder iconinstagram instagram iconpinterest pinterest iconfacebook facebook iconprint print iconsquares squares iconheart heart iconheart solid heart solid icon
Moms Russian Tea Cookies Recipe

Moms Russian Tea Cookies Recipe


5 Stars 4 Stars 3 Stars 2 Stars 1 Star

4.8 from 30 reviews

  • Total Time: 25 minutes
  • Yield: 24 1x

Description

Delightful Russian Tea Cookies bring nostalgic memories of grandmother’s kitchen, nestled with powdered sugar and delicate walnut crumbles. These melt-in-mouth morsels offer sweet comfort that connects generations through simple, cherished baking traditions.


Ingredients

Scale

Main Ingredients:

  • 2 cups (250 g) all-purpose flour
  • 1 cup (225 g) unsalted butter, softened
  • ¾ cup (90 g) finely chopped pecans or walnuts

Sweeteners and Flavor Enhancers:

  • ½ cup (60 g) powdered sugar (plus extra for rolling)
  • 1 teaspoon vanilla extract

Seasoning:

  • ¼ teaspoon salt

Instructions

  1. Cream softened butter and powdered sugar in a spacious mixing bowl, whipping until the mixture becomes airy and pale, approximately 2 minutes.
  2. Incorporate vanilla extract, blending thoroughly to distribute the fragrant essence evenly.
  3. Gently introduce flour and salt into the butter mixture, stirring carefully until ingredients are just integrated without overmixing.
  4. Delicately fold chopped nuts throughout the dough, ensuring uniform distribution of crunchy texture.
  5. Wrap the dough securely and refrigerate for half an hour to firm and enhance flavor melding.
  6. Heat oven to 350°F and prepare a parchment-lined baking sheet.
  7. Craft compact, uniform spheres approximately 1 inch in diameter from the chilled dough, positioning them with slight separation on the baking surface.
  8. Bake cookies for 12-15 minutes, watching for subtle golden edges and a set texture.
  9. Allow cookies to rest momentarily after removing from oven, then while still warm, tenderly enrobe each cookie in a generous coating of powdered sugar.
  10. Once completely cooled, perform a second delicate dusting of powdered sugar to create a pristine, snowlike appearance.

Notes

  • Chill the dough thoroughly to prevent spreading and maintain the cookies’ round shape during baking.
  • Use room temperature butter for smoother mixing and better texture, ensuring the dough combines evenly without overmixing.
  • Toast chopped nuts before adding to the dough to enhance their nutty flavor and add extra depth to the cookies.
  • Experiment with different nuts like pecans or almonds for varied taste profiles while keeping the classic Russian tea cookie texture.
  • Prep Time: 10 minutes
  • Cook Time: 15 minutes
  • Category: Desserts, Snacks
  • Method: Baking
  • Cuisine: Russian

Nutrition

  • Serving Size: 24
  • Calories: 170
  • Sugar: 19 g
  • Sodium: 1 mg
  • Fat: 0 g
  • Saturated Fat: 0 g
  • Unsaturated Fat: 0 g
  • Trans Fat: 0 g
  • Carbohydrates: 43 g
  • Fiber: 2 g
  • Protein: 1 g
  • Cholesterol: 0 mg
Jessica Martinez

Jessica Martinez

Pastry Chef & Recipe Developer

Expertise

Organic Baking Techniques, Gluten-Free Recipe Development, Southwestern Dessert Specialties, Food Styling and Photography

Education

Santa Fe Community College (SFCC)

  • Program: Certificate in Patisserie
  • Focus: Cultivating disciplined kitchen preparation for a safe, organized, and sanitary workstation; mastering the timely production of nutritious, visually appealing pastries; safely operating standard pastry equipment; and honing core patissier techniques for professional pastry work.

Jessica brings the sweet side to Urban Organic with her passion for baking and love for the Southwest. She trained at Santa Fe Community College and has built a career creating beautiful, gluten-free, and organic desserts that feel both nostalgic and new.

She believes baking should be fun, creative, and open to everyone, no matter your diet or skill level. Jessica’s recipes are simple enough to follow, but special enough to remember.

Leave a Reply

Your email address will not be published. Required fields are marked *

Recipe rating 5 Stars 4 Stars 3 Stars 2 Stars 1 Star