
Irresistible Chocolate Peanut Butter Dream Bars Recipe
Decadent desserts often spark joy, and these chocolate peanut butter dream bars blend rich, creamy textures that dance across your palate.
Sweet meets salty in a heavenly combination that melts effortlessly into pure bliss.
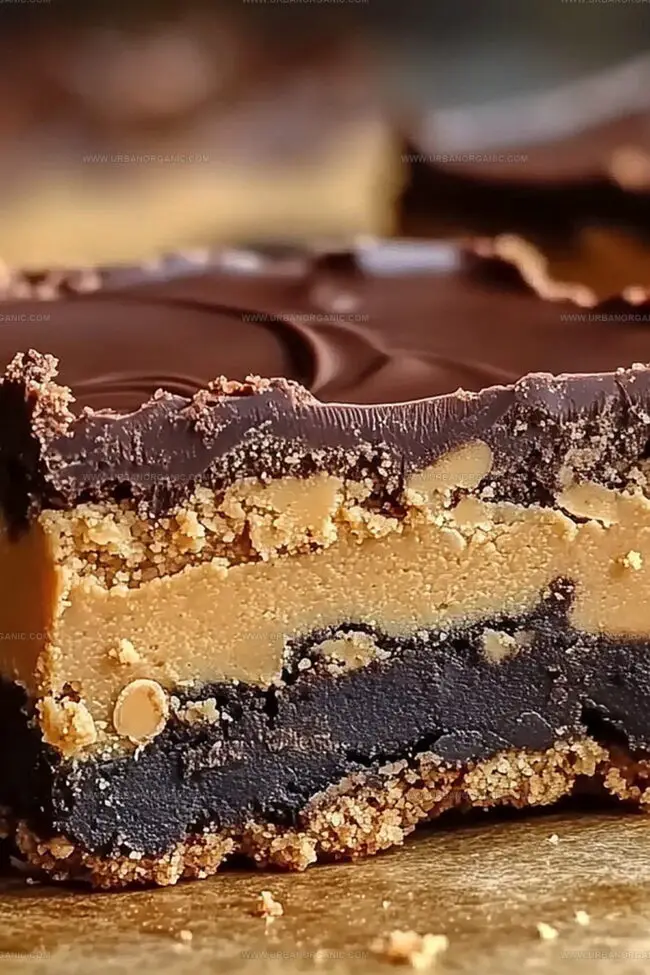
Layers of smooth chocolate and nutty peanut butter create an irresistible harmony of flavors.
Each bite promises a luxurious experience that transforms ordinary moments into delightful memories.
Crafted with simple ingredients, these bars require minimal effort but deliver maximum satisfaction.
Chocolate lovers and peanut butter enthusiasts will find themselves enchanted by this delectable treat.
Prepare to be swept away by a dessert that promises pure indulgence in every single bite.
Quick Recipe Overview
Ingredients for Chocolate Peanut Butter Dream Bars
For Crust Base:For Creamy Peanut Butter Layer:For Chocolate and Topping Layer:Tools You’ll Need to Make Chocolate Peanut Butter Dream Bars
How to Prepare Chocolate Peanut Butter Dream Bars from Scratch
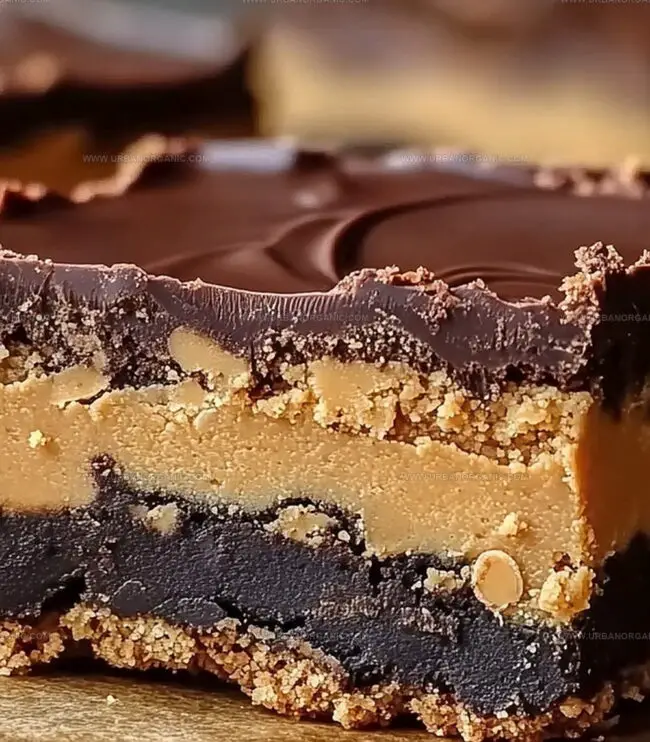
Crush cookies into fine bits and mix with melted butter. Press mixture firmly into a lined baking dish. Chill in freezer to set the foundation for your delectable dessert.
Blend peanut butter, cream cheese, powdered sugar, and vanilla until silky smooth. Gently fold in whipped topping for extra lightness. Spread evenly over the chilled crust.
Whisk pudding mix with cold milk until it transforms into a thick, luscious layer. Carefully spread this chocolatey goodness over the peanut butter base.
Cover the entire dessert with remaining whipped topping. Sprinkle with chopped peanuts and chocolate pieces for a delightful crunch and visual appeal.
Refrigerate the bars for several hours, allowing all layers to set and flavors to meld together perfectly. When ready, slice into decadent squares and serve ice-cold.
Flavor Ideas and Tips for Chocolate Peanut Butter Dream Bars
Serving Chocolate Peanut Butter Dream Bars at Any Occasion
Storing Chocolate Peanut Butter Dream Bars the Smart Way
Print
Indulgent Chocolate Peanut Butter Dream Bars Recipe
- Total Time: 20 minutes
- Yield: 13 1x
Description
Indulgent chocolate peanut butter dream bars blend rich cocoa with creamy peanut butter in a heavenly dessert. Layers of smooth chocolate and nutty filling create a luxurious treat that melts seamlessly, leaving sweet satisfaction with each delectable bite.
Ingredients
- 24 chocolate sandwich cookies (like Oreos), finely crushed
- 5 tbsps unsalted butter, melted
- 1 cup creamy peanut butter
- 8 oz (226 g) cream cheese, softened
- ½ cup powdered sugar
- 1 tsp vanilla extract
- 1 cup whipped topping (like Cool Whip or homemade)
- 1 (3.9 oz) package instant chocolate pudding mix
- 1 ½ cups cold milk
- 1 ½ cups whipped topping
- ¼ cup chopped peanuts (optional)
- Chocolate shavings or mini chocolate chips (optional)
Instructions
- Crust Creation: Pulverize cookies and meld with butter, pressing firmly into a parchment-lined baking dish. Refrigerate for a quick 15-minute firming session.
- Peanut Butter Fusion: Whip peanut butter, cream cheese, powdered sugar, and vanilla into a silky-smooth mixture. Gently fold in whipped topping, creating a luxurious layer that blankets the chilled crust with creamy precision.
- Chocolate Pudding Transformation: Vigorously blend pudding mix with cold milk until it thickens into a luscious, velvety consistency. Carefully spread this decadent chocolate layer over the peanut butter base, ensuring an even, tempting surface.
- Decorative Finale: Crown the dessert with remaining whipped topping, artfully scattering chopped peanuts and chocolate shavings across the top for a textural and visual masterpiece.
- Chill and Set: Nestle the assembled dream bars in the refrigerator for a minimum of 4 hours, allowing all layers to harmonize and solidify into a magnificent, cool dessert ready to delight.
Notes
- Press cookie crumb mixture firmly and evenly into the pan to ensure a solid, compact base that won’t fall apart when cutting.
- Use room temperature cream cheese and beat ingredients thoroughly to achieve a creamy, lump-free consistency that spreads easily.
- Whisk pudding mix and milk vigorously for exactly 2 minutes to activate thickening agents and create a silky, smooth chocolate layer.
- Allow minimum 4 hours refrigeration to let layers set completely, which helps develop rich flavors and ideal slice-able consistency.
- Prep Time: 20 minutes
- Cook Time: 0 minutes
- Category: Desserts, Snacks
- Method: None
- Cuisine: American
Nutrition
- Serving Size: 13
- Calories: 300
- Sugar: 18 g
- Sodium: 250 mg
- Fat: 18 g
- Saturated Fat: 8 g
- Unsaturated Fat: 10 g
- Trans Fat: 0 g
- Carbohydrates: 30 g
- Fiber: 1 g
- Protein: 5 g
- Cholesterol: 25 mg
Michael Thompson
Founder & Culinary Director
Expertise
Classical & Contemporary Cooking Techniques, Global Cuisine Appreciation, Nutrition & Menu Engineering, Sustainable Cooking Practices, Farm-to-Table Cuisine
Education
Southwestern Oregon Community College
Michael grew up in Oregon, where he learned early that food tastes better when it’s fresh, local, and made with care.
After earning his degree from the Southwestern Oregon Community College, he focused his career on teaching others how to cook with the seasons, reduce food waste, and reconnect with what’s on their plate.
Michael keeps his cooking simple, sustainable, and full of flavor. His favorite part of the process? Watching people realize how easy and satisfying it can be to cook a single great meal from scratch.