
Grandma’s Perfect Homemade Bread Recipe Secrets
My grandma’s perfect homemade bread recipe carries memories of warm kitchen hugs and nostalgic comfort.
She learned baking secrets from her mother in rural italy.
Kneading dough became an art form passed through generations of her family.
Soft wheat flour, gentle hands, and patience create magic in every loaf.
Rustic aromas fill the kitchen with promises of deliciousness.
Each slice connects you to generations of culinary love and tradition.
Come experience the simple joy of baking bread that nourishes both body and soul.
Grandma’s Perfect Homemade Bread: What Makes It Special
Ingredients in Grandma’s Perfect Homemade Bread
Bread Activation Components:Bread Base Ingredients:Finishing Ingredients:How to Bake Grandma’s Perfect Homemade Bread
Step 1: Activate the Yeast
Mix water, yeast, and sugar in a small bowl. Let sit until the mixture becomes frothy and bubbly, indicating the yeast is alive and ready to work its magic.
Step 2: Create the Dough Base
Combine butter, salt, and yeast mixture in a large mixing bowl. Gradually fold in flour until a soft, cohesive dough forms.
Step 3: Knead the Dough
Transfer the dough to a floured surface. Use the heel of your hand to push, fold, and stretch the dough. Continue kneading for 8-10 minutes until the texture becomes smooth and springy.
Step 4: First Rise
Place the dough in a greased bowl. Cover with a clean kitchen towel and set in a warm, draft-free spot. Allow the dough to rise until it doubles in size, approximately 1 hour.
Step 5: Shape the Loaf
Gently deflate the risen dough by punching it down. Shape into a smooth loaf and place in a greased loaf pan.
Step 6: Second Rise
Cover the loaf and let it rise again for 30-45 minutes. The dough should look puffy and slightly larger.
Step 7: Bake to Perfection
Preheat the oven to 375 degrees Fahrenheit. Bake the bread for 25-30 minutes until the crust turns golden brown. Test doneness by tapping the bottom of the loaf – it should sound hollow.
Step 8: Cool and Serve
Remove bread from the pan and cool on a wire rack. Slice and serve with softened butter, honey, or your favorite jam.
Grandma’s Homemade Bread: Baking Wisdom
Preserving Grandma’s Bread the Right Way
What to Serve with Grandma’s Homemade Bread
Alternate Takes on Grandma’s Perfect Homemade Bread
Answers for Grandma’s Bread Enthusiasts
Letting the yeast sit allows it to activate and become foamy, which confirms the yeast is alive and ready to help the bread rise. This step ensures your bread will have the right texture and volume.
The dough is properly kneaded when it becomes smooth, elastic, and springs back when you press it. After 8-10 minutes of kneading, the gluten will develop, giving your bread a better structure and texture.
If your dough doesn’t rise, it could be due to old or inactive yeast, water that’s too hot or cold, or a drafty environment. Always use fresh yeast, warm (not hot) water, and let the dough rise in a warm, draft-free spot.
Yes, tap the bottom of the bread – if it sounds hollow, it’s fully baked. A golden-brown crust is another sign that your bread is done and ready to be removed from the oven.
Print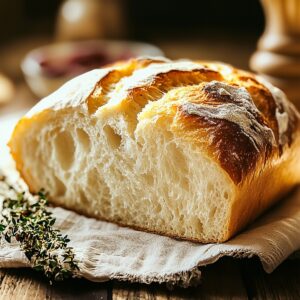
Grandmas Perfect Homemade Bread Recipe
- Total Time: 45 minutes
- Yield: 12 1x
Description
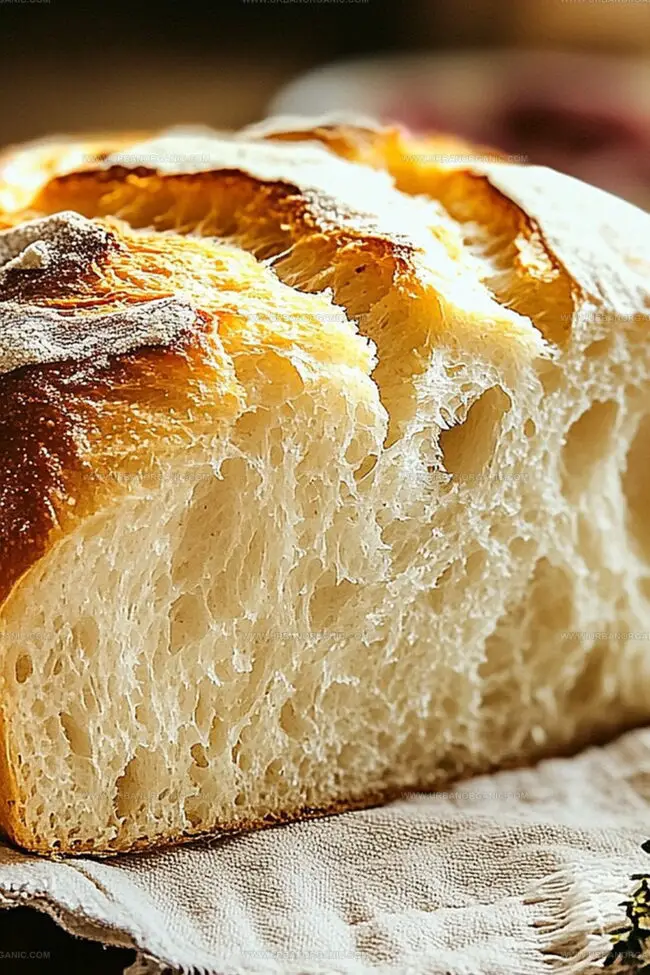
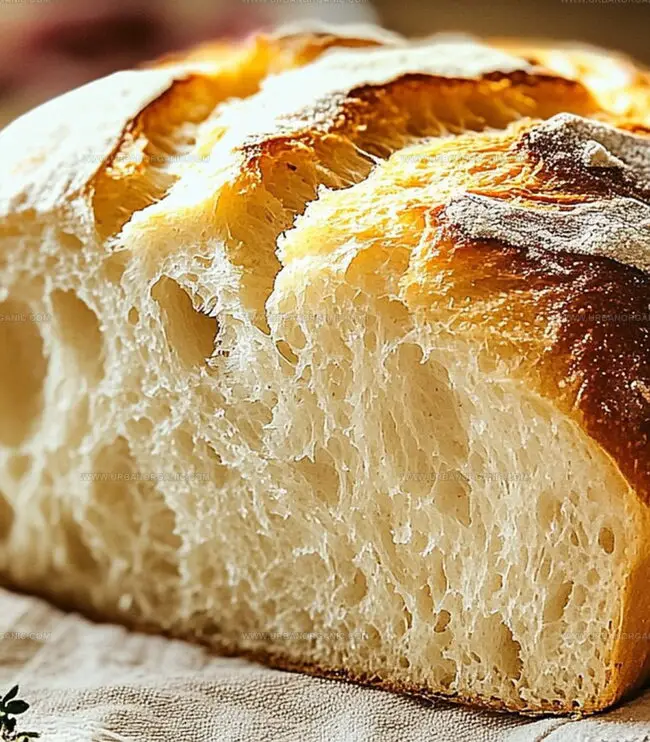
Grandma’s perfect homemade bread whispers nostalgic memories of warm kitchen comfort. Crusty exterior and pillowy interior promise pure satisfaction that connects generations through simple, loving ingredients.
Ingredients
Main Ingredients:
- 3 cups all-purpose or bread flour
- 1 cup warm water (110°F or 45°C)
- 2 ¼ teaspoons (1 packet) active dry yeast
Flavor Enhancers:
- 2 tablespoons granulated sugar
- 2 tablespoons unsalted butter, melted
- 1 teaspoon salt
Additional Ingredients:
- Extra flour for kneading
Instructions
- Activate the yeast by dissolving it in warm water with a touch of sugar, allowing the mixture to become frothy and bubbly for 5-10 minutes.
- Create a rich base by combining the activated yeast with melted butter and a pinch of salt in a spacious mixing vessel.
- Gradually incorporate flour into the liquid mixture, carefully blending until a cohesive dough begins to form.
- Transfer the nascent dough onto a lightly dusted work surface, kneading vigorously for 8-10 minutes to develop gluten and achieve a silky, responsive texture.
- Nestle the dough into a generously greased bowl, drape with a clean cloth, and position in a cozy, draft-free environment to rise and expand for approximately one hour.
- Deflate the risen dough with a gentle punch, then artfully shape it into a smooth loaf configuration.
- Situate the shaped dough into a well-greased loaf pan, cover, and allow for a secondary rising period of 30-45 minutes.
- Heat the oven to 375F (190C), preparing for the bread’s transformation.
- Bake the risen loaf until it develops a golden, crackling exterior and produces a hollow resonance when tapped, typically 25-30 minutes.
- Allow the freshly baked bread to rest in the pan for a brief 5-minute interlude before transferring to a cooling rack.
- Slice the bread and embellish with butter, honey, or your preferred spread for a delectable finishing touch.
Notes
- Check water temperature carefully, as too hot will kill yeast and too cold prevents activation.
- Invest in high-quality bread flour for better texture and rise, which provides more protein for gluten development.
- Experiment with alternative flours like whole wheat or rye for added nutrition and unique flavor profiles.
- Create dairy-free version by substituting butter with olive oil or plant-based margarine for those with dietary restrictions.
- Prep Time: 15 minutes
- Cook Time: 30 minutes
- Category: Breakfast, Snacks, Dinner
- Method: Baking
- Cuisine: American
Nutrition
- Serving Size: 12
- Calories: 590
- Sugar: 2 g
- Sodium: 1150 mg
- Fat: 39 g
- Saturated Fat: 11 g
- Unsaturated Fat: 24 g
- Trans Fat: 0 g
- Carbohydrates: 34 g
- Fiber: 1 g
- Protein: 28 g
- Cholesterol: 80 mg
Jessica Martinez
Pastry Chef & Recipe Developer
Expertise
Organic Baking Techniques, Gluten-Free Recipe Development, Southwestern Dessert Specialties, Food Styling and Photography
Education
Santa Fe Community College (SFCC)
Jessica brings the sweet side to Urban Organic with her passion for baking and love for the Southwest. She trained at Santa Fe Community College and has built a career creating beautiful, gluten-free, and organic desserts that feel both nostalgic and new.
She believes baking should be fun, creative, and open to everyone, no matter your diet or skill level. Jessica’s recipes are simple enough to follow, but special enough to remember.