Biscuit Recipe from Joy of Cooking That’s Buttery and Flaky
Joy of Cooking’s biscuit delivers a mouthwatering symphony of buttery simplicity that turns ordinary ingredients into culinary magic.
Generations have swooned over these golden treasures, each bite whispering stories of comfort and home.
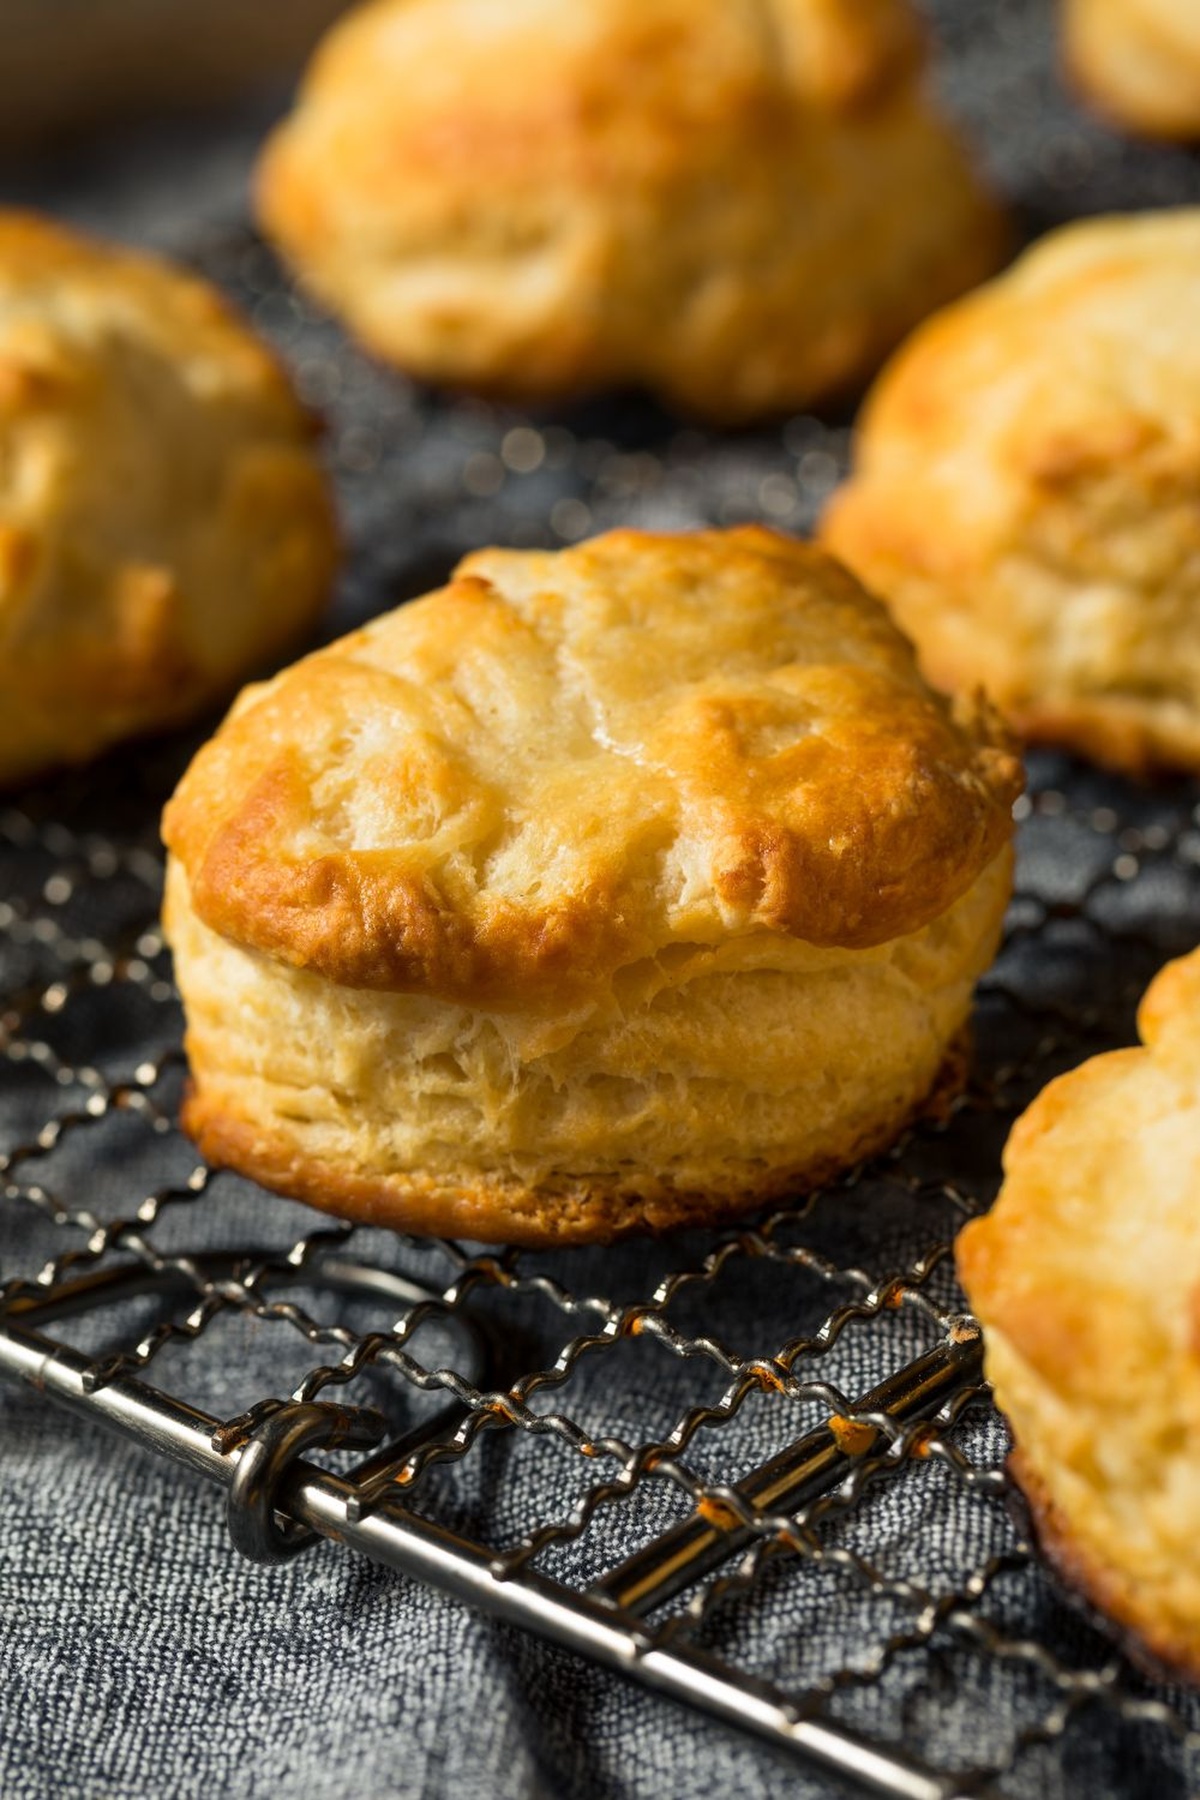
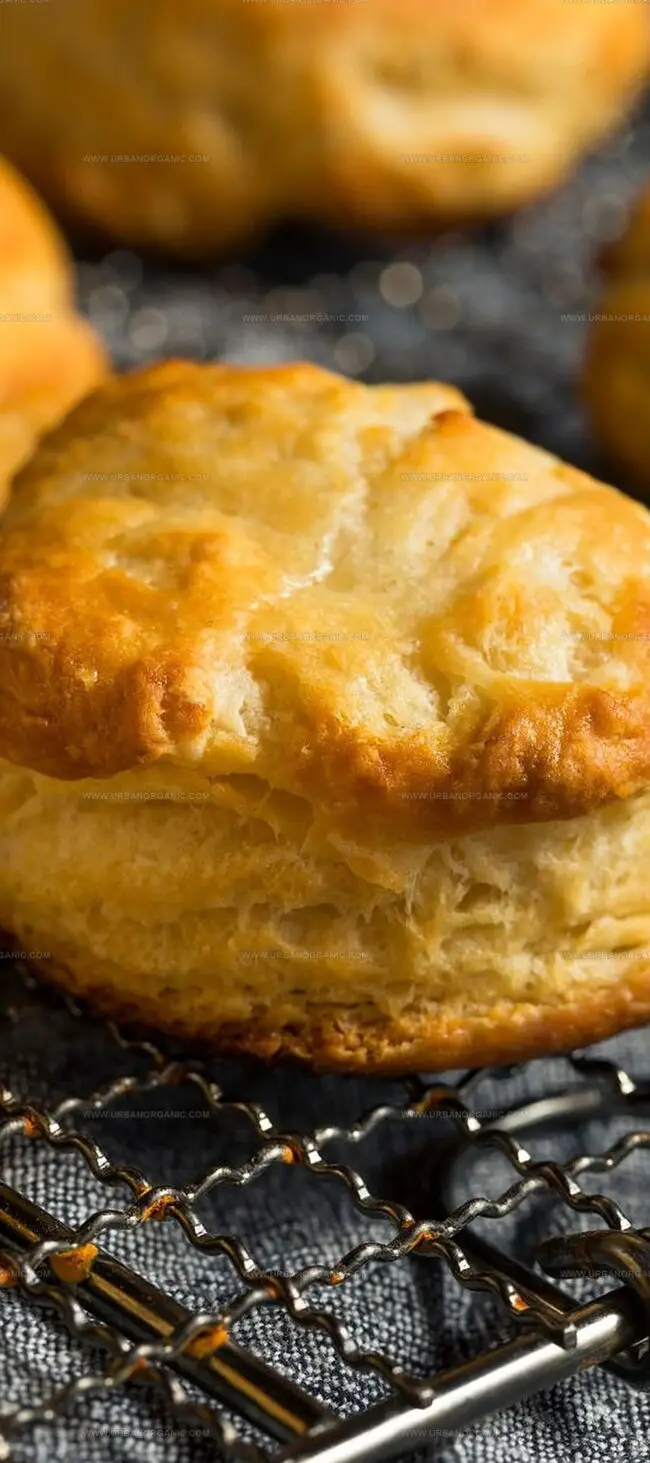
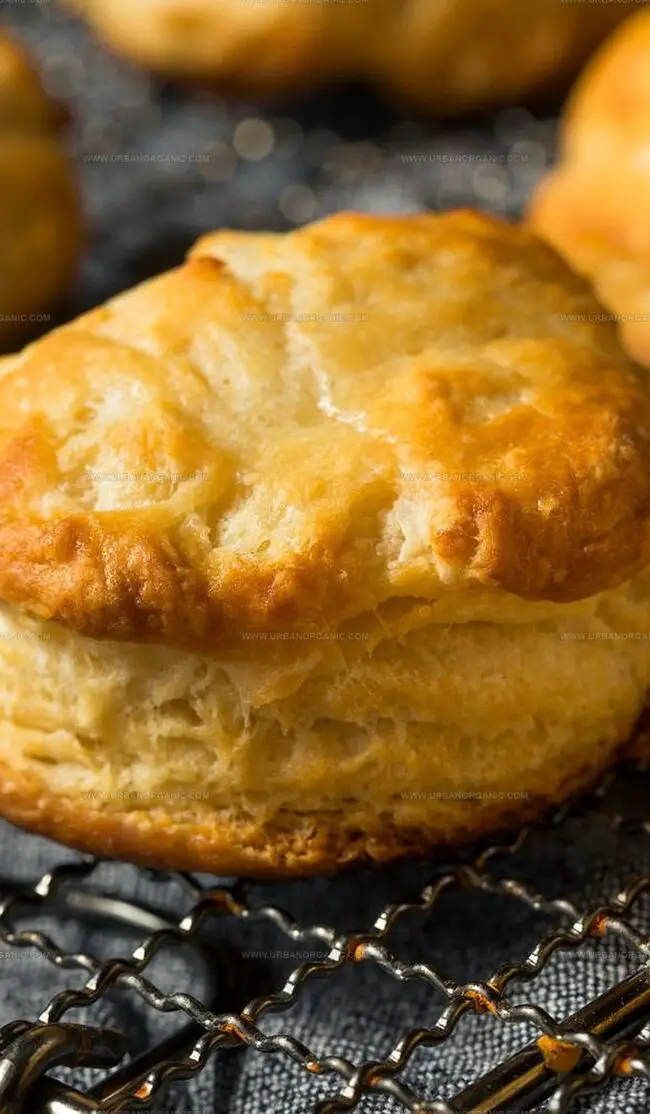
Crumbly yet tender, these biscuits dance with a delicate texture that caresses your palate.
Effortless to craft, they transform your kitchen into a fragrant haven of warmth and nostalgia.
Crisp edges give way to a pillowy interior that melts faster than winter snow.
Every baker, from novice to expert, can master this recipe with surprising ease.
These heavenly discs of deliciousness will make your taste buds sing and your heart soar with pure, unadulterated joy.
Quick Recipe Overview

What You Need to Make Homemade Biscuits
For Dry Ingredients:For Liquid Ingredients:For Fat Components:Tools Required for Classic Biscuit Recipes
How to Bake Fluffy Homemade Biscuits
Craft Fluffy Southern Biscuits
Warm your oven to a toasty 400°F. Grab a baking sheet and line it with parchment paper for easy cleanup.
Blend flour, baking powder, salt, and a touch of sugar in a spacious bowl. Whisk until everything looks perfectly combined and light.
Grab cold butter and break it into tiny pieces throughout the dry ingredients. Use your fingertips to work the butter until the mixture looks like rough, sandy texture.
Pour in cold buttermilk and a single beaten egg. Gently stir until a soft, slightly messy dough emerges. Don’t overwork the mixture – keep it relaxed and tender.
Dust your counter with flour. Softly knead the dough a few times, then pat it down to a thick, even layer. Use a round cutter to create perfect biscuit shapes with crisp edges.
Arrange biscuit rounds on the prepared sheet. Brush the tops with a splash of buttermilk for extra shine. Slide into the oven and bake until they turn a beautiful golden brown, about 15-17 minutes.
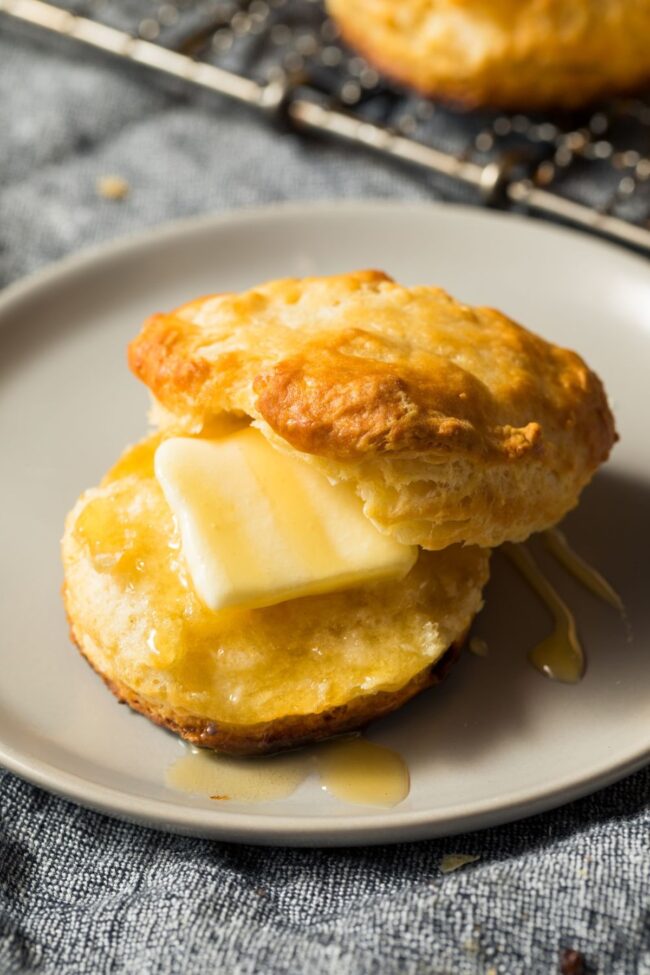
Pull out your gorgeous biscuits and let them rest briefly. Serve warm with a dollop of butter or drizzle of honey for a mouthwatering treat that’ll make everyone smile.
Biscuit Baking Tips and Flavor Additions
Mix in shredded cheese, herbs, or crumbled bacon to create unique flavor profiles that complement your meal perfectly.
Handle dough gently and minimally to keep biscuits tender. Overworking develops gluten, resulting in tough, dense biscuits that lack delicate flakiness.
Replace buttermilk with yogurt, sour cream, or non-dairy milk for different taste experiences. Each substitution brings subtle changes in richness and tang.
Wrap cooled biscuits tightly in plastic wrap or store in airtight container. Reheat briefly in oven at 350°F for 5-7 minutes to restore fresh-baked texture and warmth.
Serving Suggestions for Warm Biscuits
How to Store and Reheat Biscuits Properly
Print
Flaky Joy Of Cooking Biscuit Recipe
- Total Time: 30 minutes
- Yield: 8 1x
Description
Homemade biscuit lovers will adore this classic Joy of Cooking biscuit recipe, highlighting simple ingredients and traditional Southern techniques. Warm, flaky results emerge from careful mixing and precise baking, promising delightful comfort you can savor with butter or jam.
Ingredients
- 2 ½ cups (325 g) all-purpose flour
- ½ cup (113 g) cold unsalted butter, cut into chunks
- ¾ cup (180 ml/g) cold milk (whole or 2% reduced fat)
- 1 large cold egg (50 g), lightly beaten
- 2 ½ tsps (10 g) baking powder
- ½ tsp (2 g) kosher salt
- 1 tbsp (15 g) granulated white sugar (optional)
- milk or cream (for finishing)
Instructions
- Preparation Setup: Preheat oven to 400°F (200°C) with rack centered. Line baking sheet with parchment paper for optimal non-stick performance.
- Dry Ingredient Blend: Sift flour, baking powder, salt, and sugar together in a large mixing bowl, ensuring uniform distribution and eliminating potential lumps.
- Butter Integration: Swiftly work cold butter into dry mixture using pastry blender or fingertips, creating coarse, pea-sized crumbs that promise flaky texture.
- Dough Formation: Create a central well, pour in milk and lightly beaten egg. Gently fold wet and dry ingredients until just combined, maintaining a slightly sticky, shaggy consistency.
- Dough Handling: Transfer to floured surface and tenderly knead 4-5 times, avoiding overworking to prevent tough biscuits. Gently pat or roll to 3/4 inch thickness, ensuring even surface.
- Cutting and Shaping: Dust round cookie cutter with flour and decisively cut biscuit rounds without twisting, preserving clean edges. Arrange on prepared baking sheet with slight spacing.
- Final Touches and Baking: Brush biscuit tops with milk or cream for golden, glossy finish. Bake 15-17 minutes until rich golden-brown and toothpick comes out clean when inserted.
- Serving: Transfer to wire rack, allow brief cooling, and serve warm with a luxurious butter pat for ultimate enjoyment.
Notes
- Butter Handling: Keep butter cold and work quickly to maintain small, visible chunks that create flaky, tender biscuits.
- Mixing Technique: Fold wet and dry ingredients just until combined; overmixing leads to tough, dense biscuits.
- Cutting Precision: Use a sharp, flour-dusted cutter and press straight down without twisting to ensure clean, even biscuit edges.
- Golden Finish: Brush tops with milk or cream before baking to achieve a beautiful, glossy golden-brown surface that enhances visual appeal and flavor.
- Prep Time: 15 minutes
- Cook Time: 15 minutes
- Category: Breakfast, Snacks
- Method: Baking
- Cuisine: American
Nutrition
- Serving Size: 8
- Calories: 190
- Sugar: 2 g
- Sodium: 150 mg
- Fat: 10 g
- Saturated Fat: 6 g
- Unsaturated Fat: 4 g
- Trans Fat: 0 g
- Carbohydrates: 23 g
- Fiber: 1 g
- Protein: 3 g
- Cholesterol: 45 mg
Michael Thompson
Founder & Culinary Director
Expertise
Classical & Contemporary Cooking Techniques, Global Cuisine Appreciation, Nutrition & Menu Engineering, Sustainable Cooking Practices, Farm-to-Table Cuisine
Education
Southwestern Oregon Community College
Michael grew up in Oregon, where he learned early that food tastes better when it’s fresh, local, and made with care.
After earning his degree from the Southwestern Oregon Community College, he focused his career on teaching others how to cook with the seasons, reduce food waste, and reconnect with what’s on their plate.
Michael keeps his cooking simple, sustainable, and full of flavor. His favorite part of the process? Watching people realize how easy and satisfying it can be to cook a single great meal from scratch.