
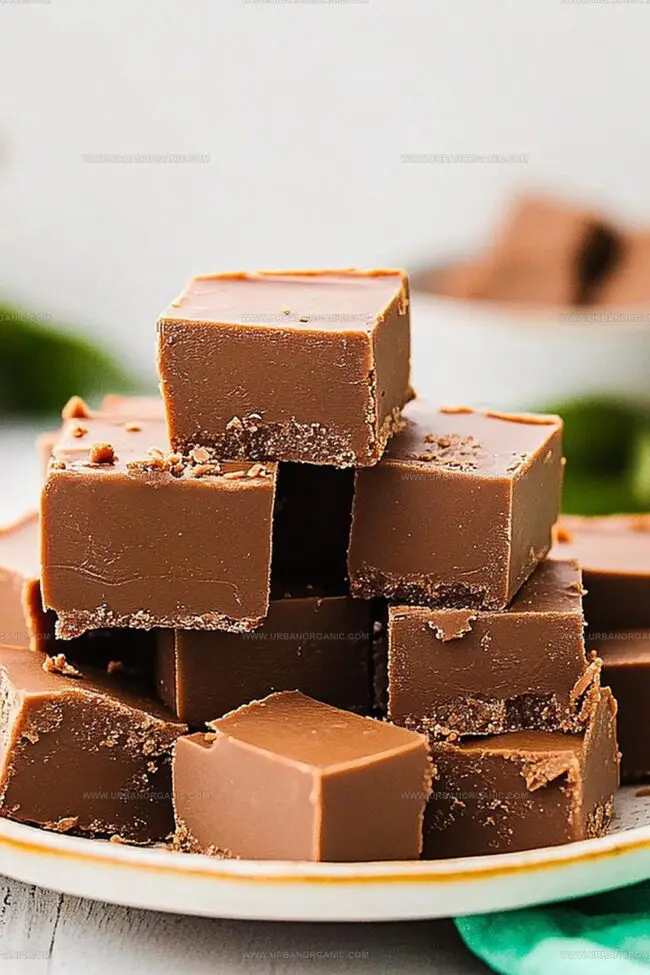
Fantasy Fudge Recipe That Melts in Your Mouth
Magic swirls through this decadent fantasy fudge that promises sweet enchantment in every delectable bite.
Chocolate lovers will find pure bliss melting across their taste buds.
Creamy textures dance with rich marshmallow softness, creating a confection that whispers indulgence.
Simple ingredients combine into something extraordinary, breaking typical dessert boundaries.
Smooth chocolate waves carry hints of nostalgic comfort and unexpected delight.
Memories of childhood kitchens blend with gourmet sophistication in each velvety square.
Craft this irresistible treat and watch joy spark in eager eyes.
Fantasy Fudge That Lives Up to the Name
What You’ll Need for Creamy, Sweet Fantasy Fudge
Main Ingredients:
Sugar Mixture:Chocolate and Binding Ingredients:Flavor Enhancers and Optional Ingredients:Pan Preparation:How to Make This Old-School Fudge Right

Step 1: Prepare Baking Dish
Line a 9×13-inch baking dish with parchment paper or lightly grease the surface to prevent sticking.
Step 2: Create Sugar Mixture
In a large saucepan over medium heat, combine:Stir continuously until the mixture reaches a rolling boil.
Step 3: Boil and Monitor Temperature
Continue boiling while stirring frequently for 4-5 minutes. Aim to reach 234°F (soft-ball stage) using a candy thermometer if available.
Step 4: Incorporate Chocolate
Remove the pan from heat and add chocolate chips. Stir until completely melted and smooth.
Step 5: Add Creamy Elements
Blend in:Mix until the mixture becomes smooth and creamy.
Step 6: Optional Nutty Boost
Gently fold in chopped walnuts if desired.
Step 7: Set and Cool
Pour the fudge into the prepared baking dish, smoothing the top with a spatula. Allow to cool at room temperature for approximately 2 hours until completely firm.
Step 8: Slice and Enjoy
Cut the fudge into small, bite-sized squares and serve.
Tips for Smooth Texture and Bold Flavor
Best Way to Store Fantasy Fudge at Its Peak
Drinks and Treats to Serve with This Fudge
Flavor Variations That Work with This Fudge
Fantasy Fudge: Your Burning Questions Answered
Use a candy thermometer to check for 234°F (soft-ball stage), or do the cold water test by dropping a small amount of hot syrup into cold water. It should form a soft, pliable ball when correctly heated.
Grainy fudge often happens when sugar crystalizes during cooking. Avoid stirring too much after the initial boiling and make sure to use clean utensils without sugar crystals on the sides.
Yes! Watch for a rolling boil and cook for 4-5 minutes, stirring frequently. The mixture should darken slightly and look thicker. The cold water test can also help determine the right consistency.
Ensure you’ve boiled the mixture long enough and measured ingredients precisely. If it’s too soft, you can reheat and cook a bit longer, or chill in the refrigerator to help it firm up more quickly.
Print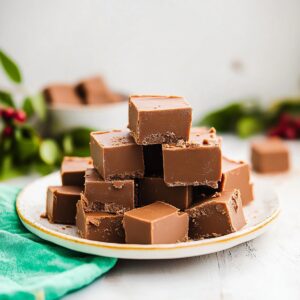
Fantasy Fudge Recipe
- Total Time: 1 hour
- Yield: 36 1x
Description
Indulgent marshmallow fantasy fudge brings nostalgic sweetness straight from grandma’s classic kitchen. Rich chocolate layers melt perfectly, offering creamy comfort that connects generations with each delectable square.
Ingredients
Main Ingredients:
- 3 cups (680 grams) granulated sugar
- 1 (12 ounces / 340 grams) bag semi-sweet chocolate chips
- 1 (7 ounces / 198 grams) jar marshmallow creme
Dairy and Fat Ingredients:
- ¾ cup (170 grams) unsalted butter
- ⅔ cup (158 milliliters) evaporated milk
Flavor and Optional Ingredients:
- 1 teaspoon vanilla extract
- 1 cup (120 grams) chopped walnuts (optional)
Instructions
- Prepare a 9×13-inch baking dish by lining it with parchment paper or applying a light greasing to prevent sticking.
- In a large saucepan, combine sugar, butter, and evaporated milk over medium heat, stirring consistently until the mixture reaches a robust, rolling boil.
- Maintain the boiling process for 4-5 minutes, stirring frequently to prevent scorching. If available, use a candy thermometer to monitor the temperature until it hits 234°F, which indicates the soft-ball stage.
- Remove the saucepan from heat and immediately incorporate chocolate chips, stirring until they completely melt and create a smooth, glossy texture.
- Gently fold in marshmallow creme and vanilla extract, continuing to stir until the mixture becomes uniformly creamy and well-integrated.
- For added texture and flavor, carefully incorporate chopped walnuts into the fudge mixture if desired.
- Transfer the molten fudge into the prepared baking dish, using a spatula to spread it evenly and create a uniform surface.
- Allow the fudge to rest and solidify at room temperature for approximately 2 hours, ensuring it becomes completely firm before cutting.
- Once set, slice the fudge into small, bite-sized squares and serve, enjoying the rich, decadent treat.
Notes
- Select high-quality chocolate chips for richer, deeper flavor complexity that elevates the entire fudge experience.
- Check candy thermometer accuracy before cooking to ensure precise temperature measurement for perfect texture.
- Consider using dark chocolate or semi-sweet chips for less sweetness and more intense chocolate profile.
- Prevent sugar crystallization by avoiding stirring once mixture reaches boiling point and using clean utensils throughout cooking process.
- Prep Time: 30 minutes
- Cook Time: 30 minutes
- Category: Desserts, Snacks
- Method: Boiling
- Cuisine: American
Nutrition
- Serving Size: 36
- Calories: 230
- Sugar: 27 g
- Sodium: 40 mg
- Fat: 10 g
- Saturated Fat: 6 g
- Unsaturated Fat: 4 g
- Trans Fat: 0 g
- Carbohydrates: 35 g
- Fiber: 1 g
- Protein: 2 g
- Cholesterol: 15 mg
Jessica Martinez
Pastry Chef & Recipe Developer
Expertise
Organic Baking Techniques, Gluten-Free Recipe Development, Southwestern Dessert Specialties, Food Styling and Photography
Education
Santa Fe Community College (SFCC)
Jessica brings the sweet side to Urban Organic with her passion for baking and love for the Southwest. She trained at Santa Fe Community College and has built a career creating beautiful, gluten-free, and organic desserts that feel both nostalgic and new.
She believes baking should be fun, creative, and open to everyone, no matter your diet or skill level. Jessica’s recipes are simple enough to follow, but special enough to remember.