
Homemade Red Velvet Cake Balls Recipe: Irresistible Joy
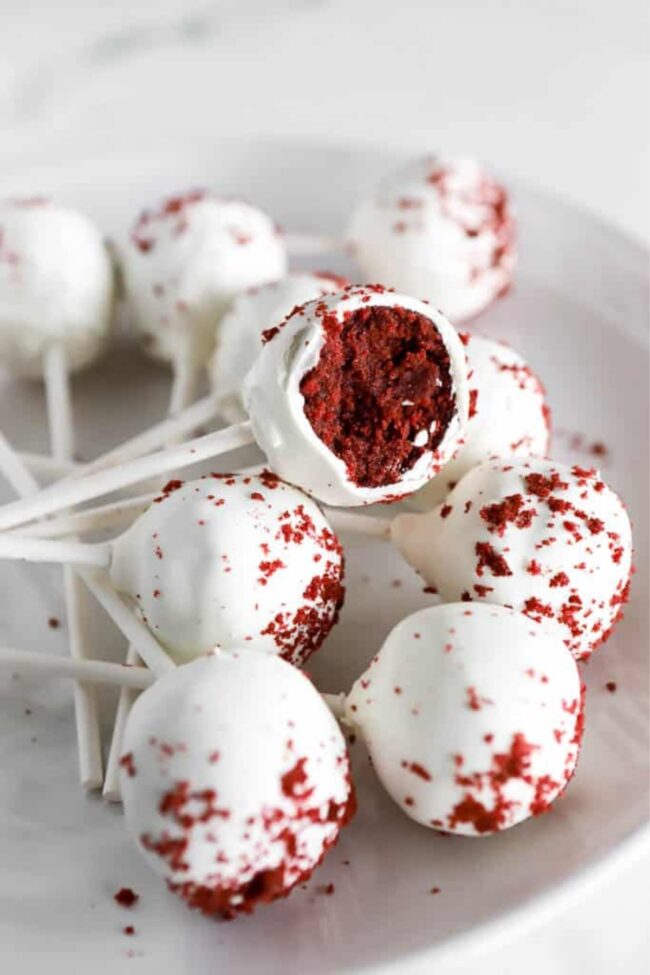
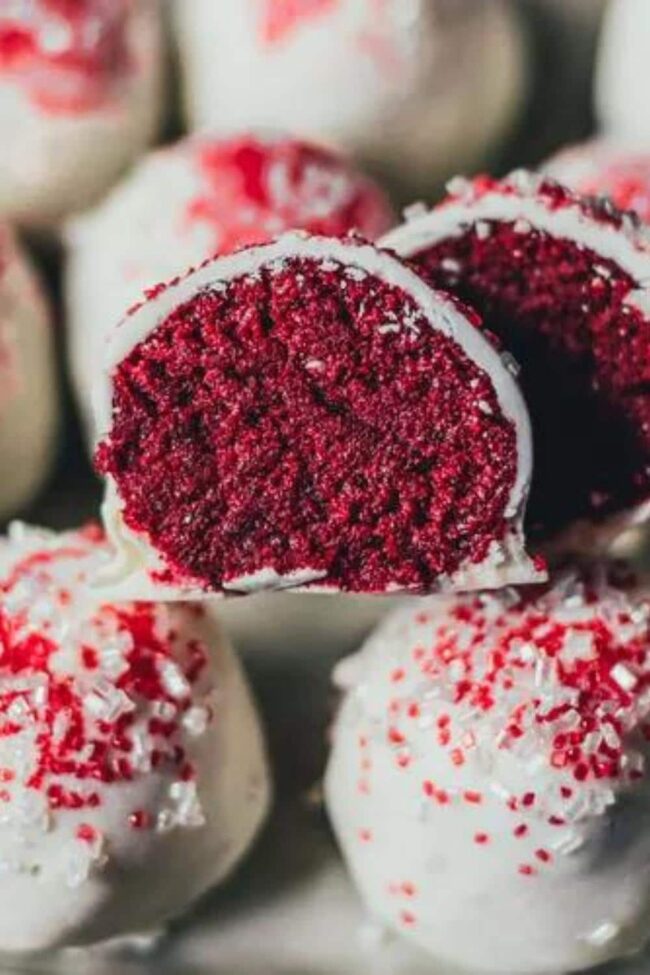
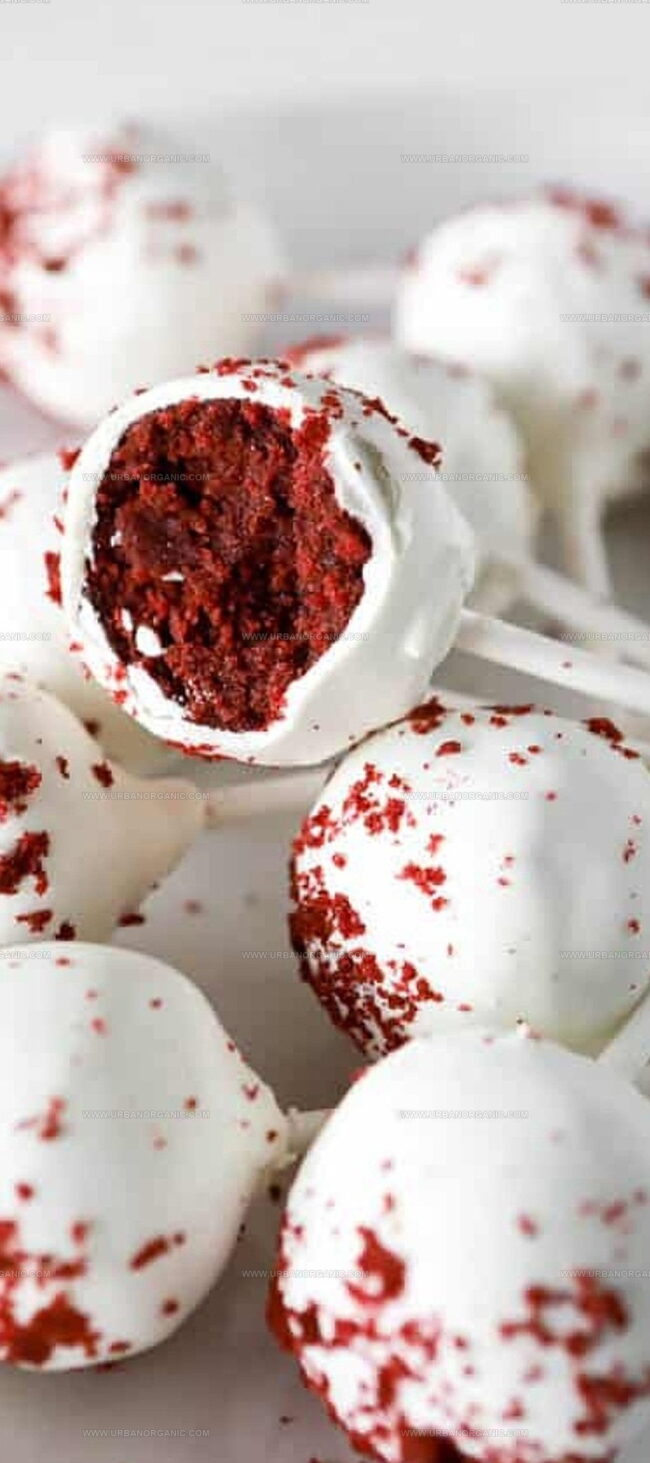
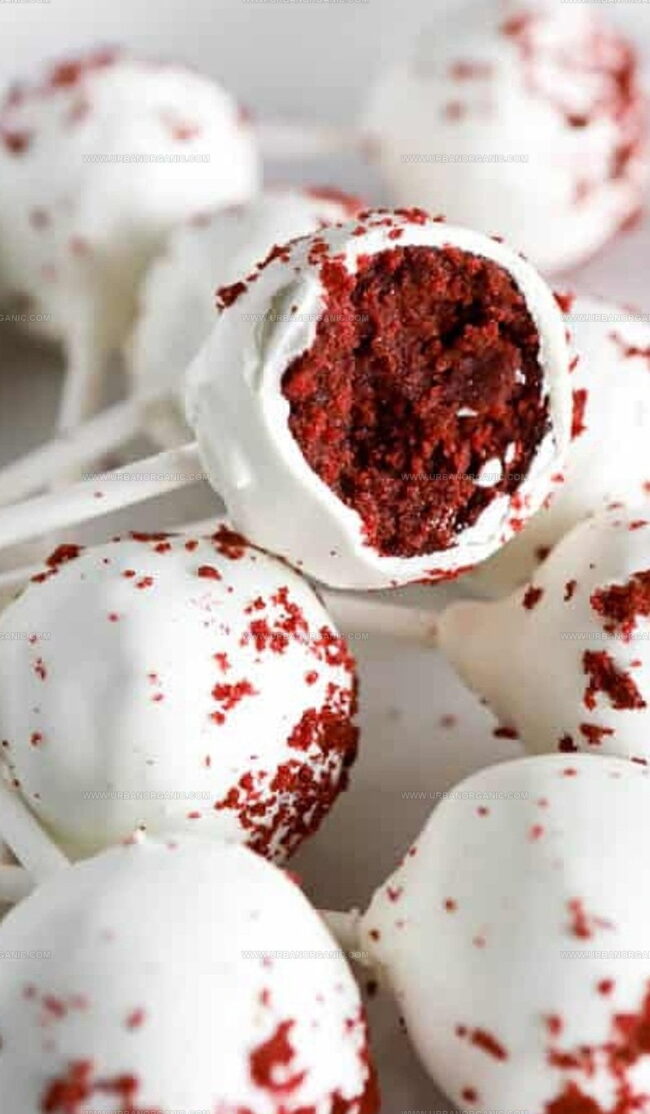
Red velvet cake balls burst with Southern charm and culinary magic, transforming ordinary dessert moments into extraordinary experiences.
These crimson-kissed spheres of delight blend velvety cake crumbs with luscious frosting in perfect harmony.
Compact yet decadent, each bite delivers a symphony of rich flavors that dance across your palate.
Chocolate whispers softly beneath the signature ruby-red hue, creating an irresistible treat that beckons sweet lovers.
The delicate balance of tanginess and sweetness makes these cake balls a true celebration of indulgence.
Smooth, elegant, and utterly addictive, these miniature morsels promise to elevate any gathering with their luxurious charm.
Quick Recipe Overview
Ingredients for Red Velvet Cake Balls
For Cake Base:For Binding and Moisture:For Frosting and Coating:Supplies to Shape Pioneer Woman Red Velvet Balls
Making Red Velvet Cake Balls Step-by-Step
Preheat the oven and mix cake ingredients in a large bowl until smooth and creamy. Grease a baking pan and pour the batter evenly, ensuring a perfect foundation for your dessert.
Bake until golden and a toothpick comes out clean. Allow the cake to cool completely, giving it time to settle and develop a rich, tender texture.
Blend cream cheese and butter until silky smooth. Gradually incorporate sugar and vanilla, whipping the mixture until it becomes light and luxurious.
Crumble the cooled cake and fold in frosting. Roll the mixture into bite-sized spheres, creating perfectly portioned treats that promise pure indulgence.
Melt white chocolate until glossy and smooth. Gently dip each cake ball, allowing excess chocolate to drip away. Sprinkle with decorative toppings and chill until the coating sets, transforming simple cake balls into elegant confections ready to delight.
Tips for Texture and Flavor in Cake Balls

How to Serve Red Velvet Cake Balls at Events
Keeping Cake Balls Fresh for Days

Effortless Red Velvet Cake Balls Recipe
- Total Time: 1 hour 10 minutes
- Yield: 24 1x
Description
Red velvet cake balls blend classic Southern charm with irresistible sweetness. Compact chocolate-kissed spheres offer delightful bite-sized indulgence you’ll crave again and again.
Ingredients
- 1 package (15.25 oz / 432 g) red velvet cake mix
- 1 cup (240 ml) whole milk
- ⅓ cup (76 g / 2 ⅔ oz) melted salted butter
- 3 packages (10 oz / 283 g each) white vanilla-flavored melting wafers
- 1 package (8 oz / 226 g) cream cheese, softened
- ½ cup (114 g / 4 oz) salted butter, softened
- 4 cups (454 g / 16 oz) powdered sugar
- 3 tsp vanilla extract
- 1 tbsp vegetable shortening
- 2 tbsps all-purpose flour
- red and white sprinkles
- red and white sanding sugars
Instructions
- Cake Preparation: Preheat oven to 350°F. Combine cake mix, milk, melted butter, and vanilla extract in a mixing bowl. Beat mixture until smooth and well-blended, approximately 3 minutes.
- Baking Process: Grease a 13×9-inch baking pan with vegetable shortening and dust with flour. Pour batter evenly into prepared pan and bake for 24-28 minutes. Confirm doneness with a toothpick test. Rest cake in pan for 15 minutes, then transfer to a cooling rack.
- Frosting Creation: Once cake is completely cooled, cream together cream cheese and butter until smooth. Gradually add powdered sugar and vanilla extract, whipping until light and fluffy.
- Cake Ball Formation: Crumble cooled cake into a large bowl. Incorporate cream cheese frosting, mixing thoroughly. Shape mixture into 48 uniform one-inch balls. Arrange on baking sheets, cover with plastic wrap, and refrigerate for 8 hours or overnight.
- Coating and Finishing: Melt white melting wafers according to package instructions. Dip each cake ball using a fork, allowing excess coating to drip off. Place on parchment-lined baking sheet and immediately garnish with sprinkles. Refrigerate for at least 1 hour to set and enhance flavor.
Notes
- Chill for Success: Refrigerate cake balls for at least 8 hours to enhance texture and make coating easier, preventing crumbling during the dipping process.
- Smooth Coating Technique: Use a fork when dipping cake balls in melted white chocolate to achieve a clean, professional-looking finish with minimal excess dripping.
- Temperature Matters: Allow cake to cool completely (about 2 hours) before crumbling to ensure optimal texture and prevent moisture issues in the cake balls.
- Precise Sizing: Create uniform 1-inch cake balls for consistent baking and an elegant presentation that ensures even coating and perfect bite-sized treats.
- Prep Time: 40 minutes
- Cook Time: 30 minutes
- Category: Desserts, Snacks
- Method: Baking
- Cuisine: American
Nutrition
- Serving Size: 24
- Calories: 240
- Sugar: 30g
- Sodium: 200mg
- Fat: 12g
- Saturated Fat: 7g
- Unsaturated Fat: 4g
- Trans Fat: 0g
- Carbohydrates: 34g
- Fiber: 1g
- Protein: 2g
- Cholesterol: 25mg
Michael Thompson
Founder & Culinary Director
Expertise
Classical & Contemporary Cooking Techniques, Global Cuisine Appreciation, Nutrition & Menu Engineering, Sustainable Cooking Practices, Farm-to-Table Cuisine
Education
Southwestern Oregon Community College
Michael grew up in Oregon, where he learned early that food tastes better when it’s fresh, local, and made with care.
After earning his degree from the Southwestern Oregon Community College, he focused his career on teaching others how to cook with the seasons, reduce food waste, and reconnect with what’s on their plate.
Michael keeps his cooking simple, sustainable, and full of flavor. His favorite part of the process? Watching people realize how easy and satisfying it can be to cook a single great meal from scratch.