Whip Up Zesty Colorful Fruity Pebbles Cheesecake Tacos Recipe
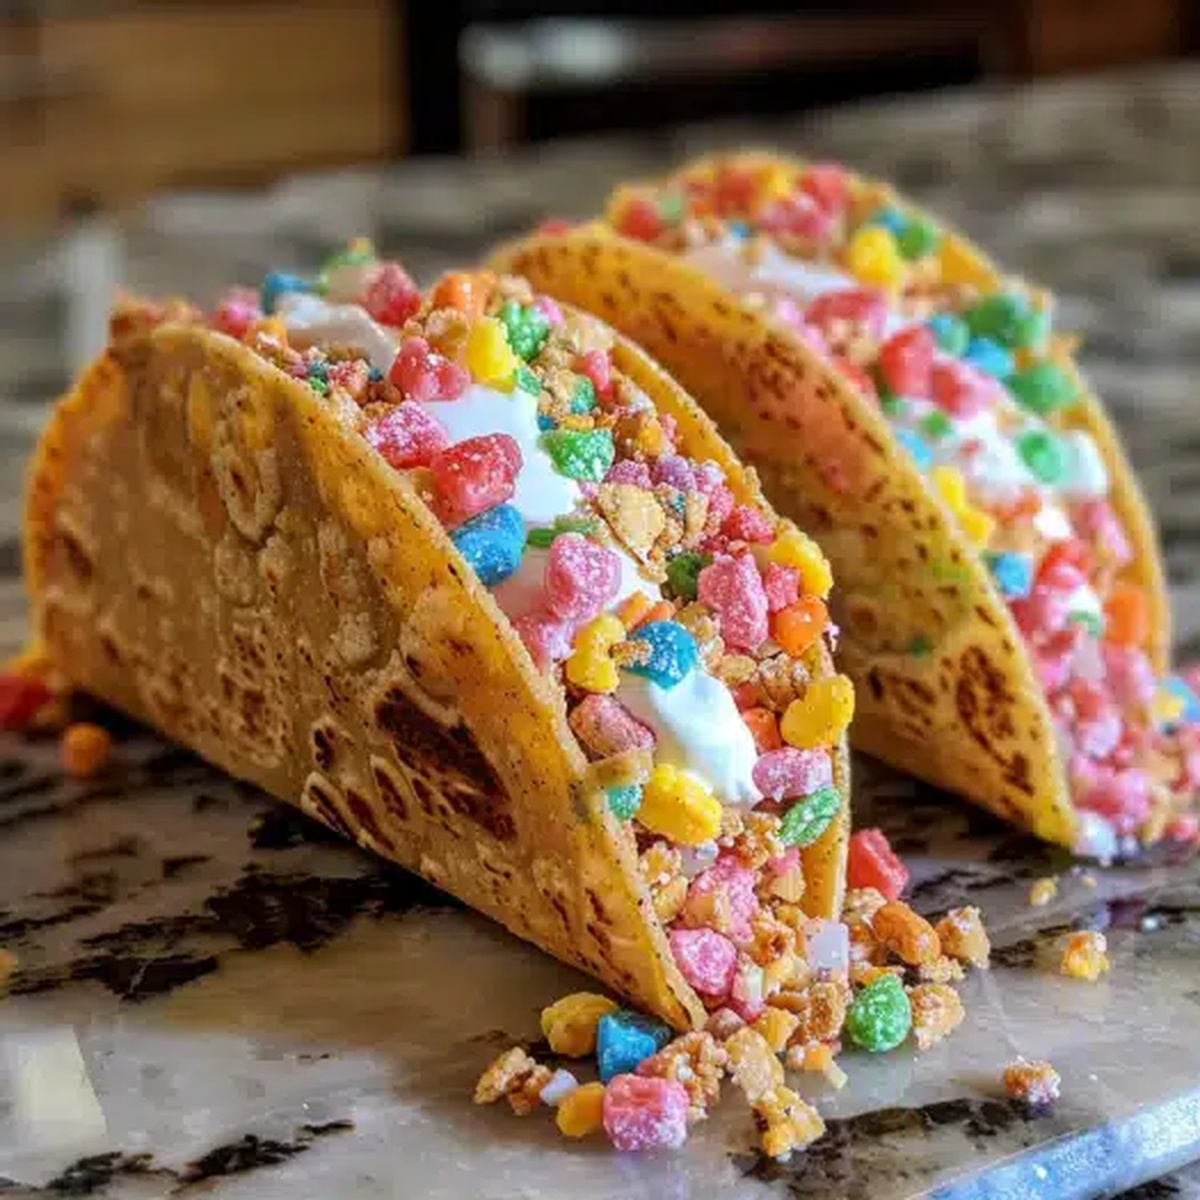
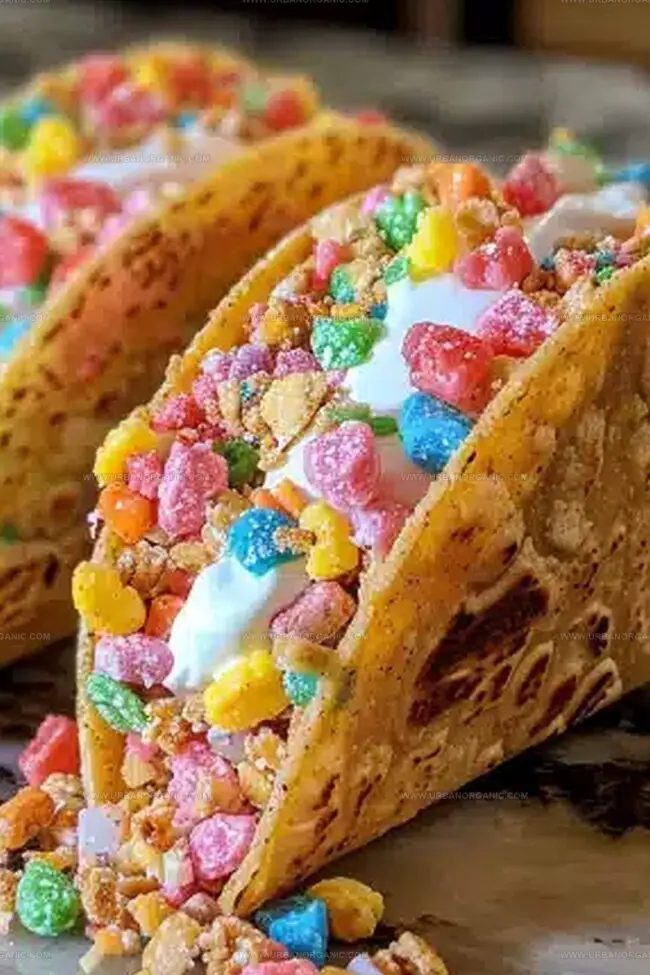
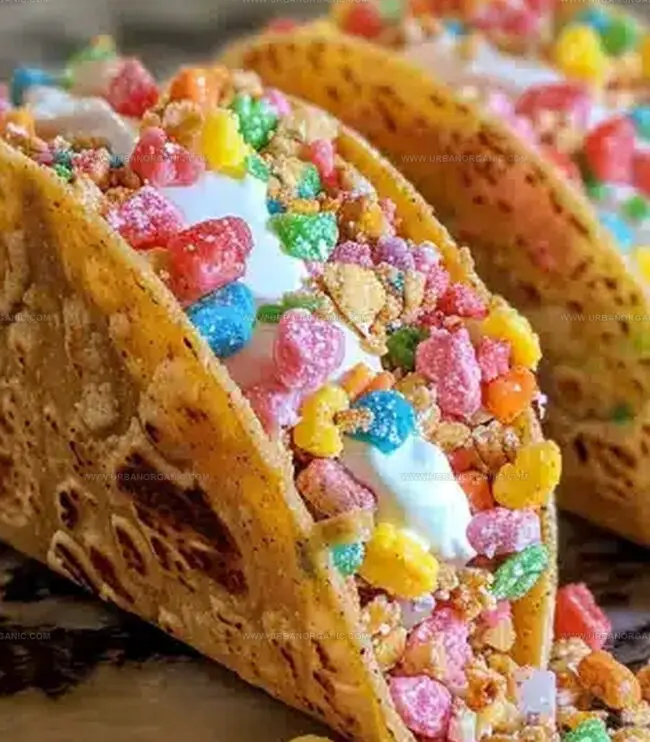
Dessert lovers swoon over this delightful Fruity Pebbles cheesecake tacos that blend childhood nostalgia with grown-up indulgence.
Sweet cereal crunch meets creamy cheesecake in a playful twist that defies traditional dessert boundaries.
Crisp taco shells coated with colorful Fruity Pebbles create a stunning visual and textural experience.
Each bite promises a delightful explosion of flavors and textures that dance across your palate.
Vibrant colors and unexpected combinations make this dessert a guaranteed conversation starter at any gathering.
Summer parties or weekend treat times call for something this whimsical and fun.
Prepare to dazzle everyone with a dessert that breaks all the rules and delights every sense.
Quick Recipe Overview
Fruity Pebbles Cheesecake Tacos – What to Grab First
For Taco Shell Base:For Creamy Filling:For Garnish and Decoration:Tools That Help Build Cheesecake Tacos with Crunch
Making Fruity Pebbles Cheesecake Tacos from Start to Finish
Melt butter in a pan and stir in marshmallows until silky smooth. Mix in Fruity Pebbles cereal until every piece is coated. While mixture is warm, shape shells by draping over the back of a spoon or rolling pin. Let shells cool and firm up on a parchment-lined baking sheet.
Beat cream cheese until velvety. Add powdered sugar and vanilla, mixing until luxuriously smooth. In another bowl, whip heavy cream until it forms stiff, fluffy peaks. Gently fold whipped cream into cream cheese mixture, creating a light and airy filling.
Fill each crispy Pebbles shell with the dreamy cheesecake mixture. Get creative with toppings – sprinkle extra cereal, add a dollop of whipped cream, or anything else that catches your fancy.
Pop your finished tacos in the refrigerator for 15-30 minutes to let them set. This step is optional but helps the filling firm up nicely. Enjoy your playful, sweet treat!
Fun Variations for These Colorful Cheesecake Tacos
Ways to Serve Fruity Pebbles Tacos at Parties
How to Store These Tacos Without Losing Texture
Print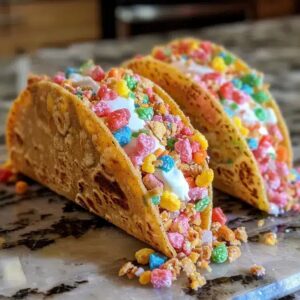
Colorful Fruity Pebbles Cheesecake Tacos Recipe
- Total Time: 35 minutes
- Yield: 9 1x
Description
Delightful “Fruity Pebbles Cheesecake Tacos” blend childhood nostalgia with gourmet dessert creativity. Sweet cereal shells cradle creamy cheesecake filling, offering an irresistible treat that will satisfy any craving.
Ingredients
- 2 cups (480 ml) Fruity Pebbles cereal (or Cocoa Pebbles for a chocolatey version)
- 2 cups (240 g) mini marshmallows
- 2 tbsps (28 g) butter
- 8 oz (226 g) cream cheese, softened
- ½ cup (60 g) powdered sugar
- 1 tsp vanilla extract
- 1 cup (240 ml) heavy whipping cream, cold
- Pebbles cereal (extra, for topping)
- Whipped cream (optional)
- Sprinkles (optional)
- White chocolate drizzle (optional)
Instructions
- Taco Shell Crafting: Gently melt butter in a medium saucepan over low heat, then incorporate marshmallows until achieving a silky smooth consistency. Remove from heat and thoroughly fold in Fruity Pebbles cereal, ensuring complete coating. While mixture remains warm, delicately mold approximately two tablespoons over a greased utensil handle, creating elegant curved taco shell shapes. Transfer shells onto parchment-lined baking sheet, allowing them to solidify and cool completely.
- Cheesecake Filling Preparation: Whip cream cheese until achieving a velvety texture, then seamlessly blend powdered sugar and vanilla extract for a luxurious, creamy foundation. In a separate vessel, whisk heavy cream until forming distinctive stiff peaks. Tenderly fold whipped cream into cream cheese mixture, creating an airy, decadent filling with gentle, sweeping motions.
- Taco Assembly: Artfully pipe or spoon cheesecake filling into crisp Pebbles taco shells, ensuring elegant distribution. Embellish with additional cereal fragments, dollops of whipped cream, or creative garnishes that spark visual and gustatory delight. For enhanced structural integrity, consider a brief 15-minute chilling period in the refrigerator before serving.
Notes
- Use fresh, soft marshmallows for smoother, easier melting and better binding with Fruity Pebbles cereal.
- Ensure consistent taco shell thickness by using a uniform scooping technique and gently pressing mixture over mold to prevent breakage.
- Lightly grease hands with cooking spray or butter when shaping taco shells to minimize sticking and create smoother shells.
- Add a pinch of powdered sugar or cream cheese stabilizer while whipping cream to maintain firm peaks and prevent deflation in cheesecake filling.
- Prep Time: 20 minutes
- Cook Time: 15 minutes
- Category: Desserts, Snacks
- Method: Baking
- Cuisine: American
Nutrition
- Serving Size: 9
- Calories: 250
- Sugar: 20 g
- Sodium: 150 mg
- Fat: 15 g
- Saturated Fat: 9 g
- Unsaturated Fat: 4 g
- Trans Fat: 0 g
- Carbohydrates: 28 g
- Fiber: 1 g
- Protein: 3 g
- Cholesterol: 40 mg
Michael Thompson
Founder & Culinary Director
Expertise
Classical & Contemporary Cooking Techniques, Global Cuisine Appreciation, Nutrition & Menu Engineering, Sustainable Cooking Practices, Farm-to-Table Cuisine
Education
Southwestern Oregon Community College
Michael grew up in Oregon, where he learned early that food tastes better when it’s fresh, local, and made with care.
After earning his degree from the Southwestern Oregon Community College, he focused his career on teaching others how to cook with the seasons, reduce food waste, and reconnect with what’s on their plate.
Michael keeps his cooking simple, sustainable, and full of flavor. His favorite part of the process? Watching people realize how easy and satisfying it can be to cook a single great meal from scratch.