Gooey Chocolate Lava Cake Cookies Recipe: Sweet Baking Magic
Sweet chocolate lava cake cookies promise a delightful twist on a classic dessert.
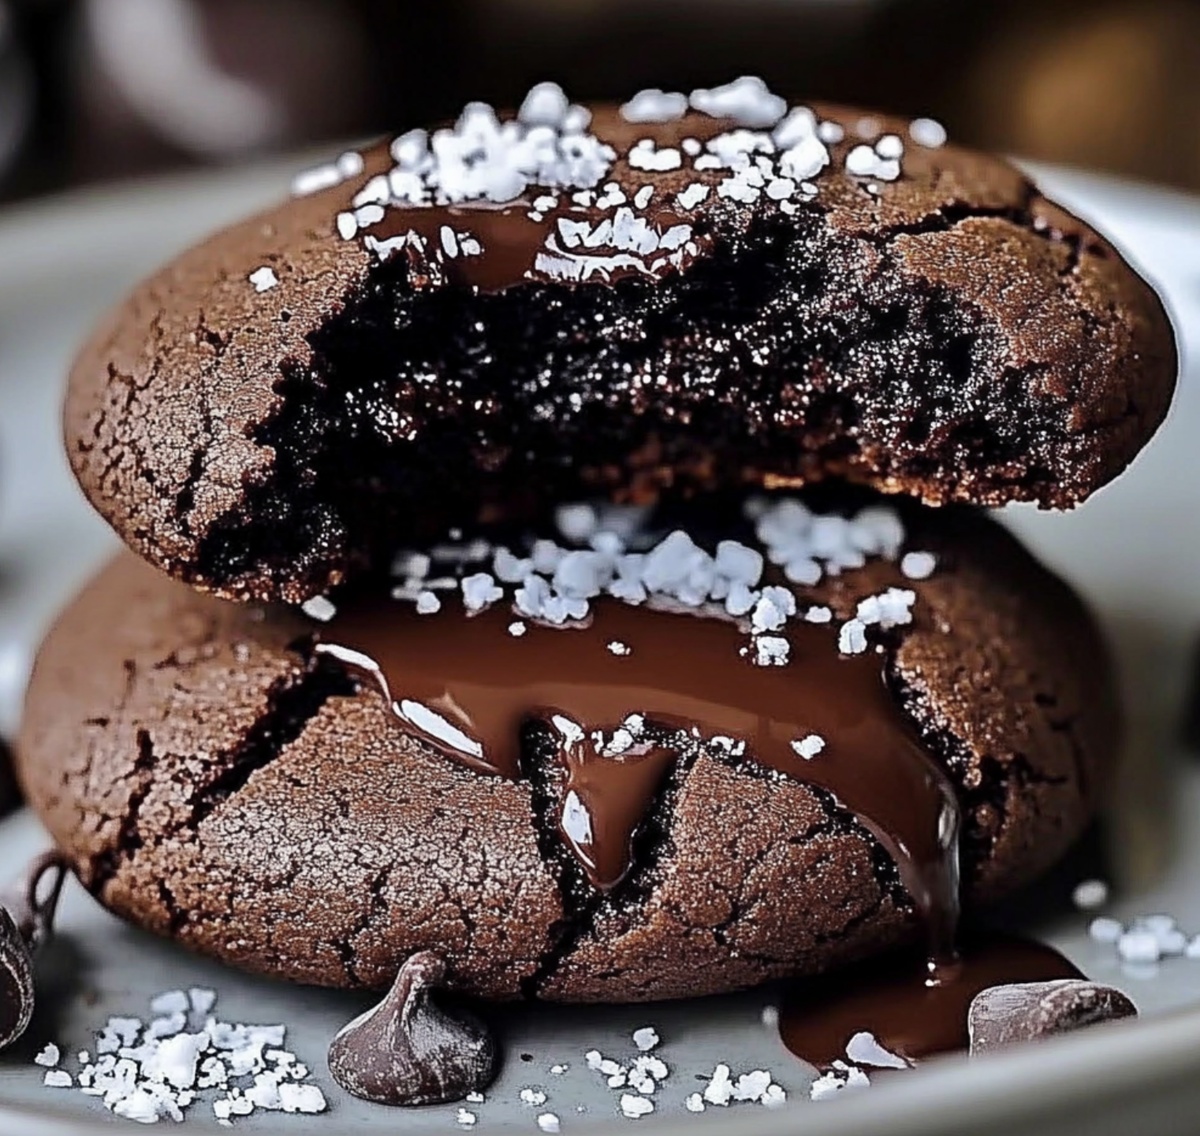
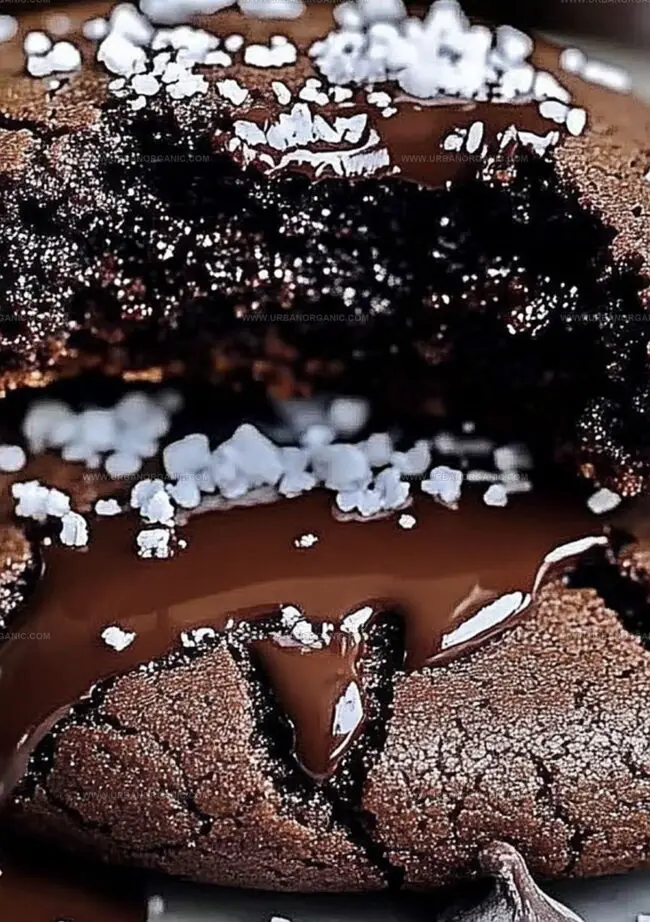
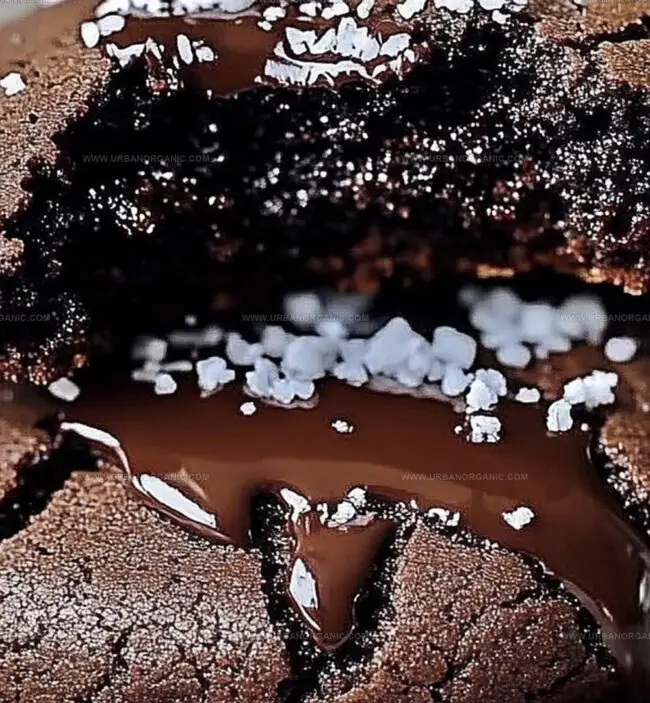
Molten centers burst with rich, velvety chocolate that melts right on your plate.
Baking these treats feels like creating magic in your kitchen.
Each cookie delivers a surprising interior that oozes decadent chocolate goodness.
Soft, crumbly edges give way to a gooey, intense center that surprises with every bite.
Minimal ingredients and simple steps make this recipe accessible for home bakers of all skill levels.
You’ll want to share these irresistible cookies with everyone around you.
Prepare to fall in love with this unexpected dessert sensation.
Why Chocolate Lava Cake Cookies Are So Decadent
What You Need for Lava Cake Cookies
Main Cookie Ingredients:Dry Ingredients:Optional Flavor Enhancers:How to Bake Gooey Centers with Crisp Edges
Step 1: Cream the Sweet Base
In a large mixing bowl, blend butter, brown sugar, and granulated sugar until the mixture becomes creamy and light, creating a smooth foundation for your cookies.
Step 2: Introduce Moisture and Flavor
Add the egg and vanilla extract, stirring thoroughly until everything combines into a uniform mixture that looks glossy and well-integrated.
Step 3: Craft the Dry Ingredient Blend
Grab another bowl and whisk together:Ensure all dry ingredients are evenly distributed with no clumps.
Step 4: Merge Wet and Dry Components
Gradually fold the dry ingredient mixture into the wet ingredients, stirring gently until a soft, rich dough emerges. The consistency should be slightly sticky but holding together.
Step 5: Create Lava Cake Magic
Scoop rounded portions of dough onto a baking sheet, leaving space between each cookie. The secret to the lava effect is creating a slightly underbaked center that remains gooey and molten when served warm.
Step 6: Bake to Perfection
Slide the baking sheet into a preheated oven and bake until the edges are set but the center remains slightly soft. This technique captures the essence of a traditional lava cake within a cookie format.
Step 7: Cool and Serve
Allow cookies to rest on the baking sheet for a few minutes, then transfer to a wire rack. Serve warm for the ultimate chocolate lava experience.
Tips for Even Baking and Smooth Chocolate
How to Store Lava Cookies Without Losing Texture
Dessert Ideas That Match Lava Cookies
Flavor Add-Ins to Try with This Cookie
Chocolate Lava Cookie Questions Answered
The chocolate center should be soft and runny when you gently press the center of the cookie. It will look slightly underbaked but will set as it cools, creating that signature molten chocolate flow.
Yes, you can prepare the cookie dough in advance and refrigerate it for up to 3 days. This actually helps develop deeper flavors and makes the cookies easier to shape.
Use high-quality chocolate with at least 60% cocoa content and place a small piece of chocolate in the center of each cookie dough ball before baking. This ensures a rich, melty chocolate core when the cookies are fresh out of the oven.
No special equipment is needed. Just a standard mixing bowl, baking sheet, and basic baking tools like a whisk and spatula will work perfectly for creating these decadent chocolate lava cookies.
Print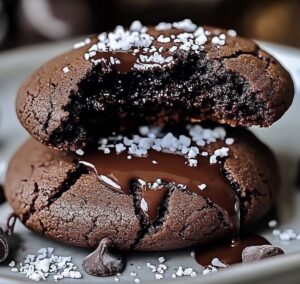
Chocolate Lava Cake Cookies Recipe
- Total Time: 20 minutes
- Yield: 12 1x
Description
Indulgent chocolate lava cake cookies melt hearts with their gooey centers and rich cocoa charm. Warm, chocolatey goodness invites you to savor each irresistible bite of pure dessert bliss.
Ingredients
Main Ingredients:
- 1 cup all-purpose flour
- ⅓ cup unsweetened cocoa powder
- 4 ounces (113 grams) semi-sweet or dark chocolate
Sugars and Sweeteners:
- ½ cup brown sugar
- ¼ cup granulated sugar
- Powdered sugar (for dusting)
Wet Ingredients and Additions:
- ½ cup (1 stick or 113 grams) unsalted butter (softened)
- 1 large egg
- 1 teaspoon vanilla extract
- ½ teaspoon baking soda
- ¼ teaspoon salt
- Vanilla ice cream or whipped cream (for serving)
Instructions
- Cream softened butter with brown and granulated sugars until the mixture becomes light and airy, creating a smooth base for the cookie dough.
- Incorporate egg and vanilla extract into the sugar-butter mixture, blending thoroughly to ensure a uniform consistency.
- Sift together flour, cocoa powder, baking soda, and salt in a separate bowl, breaking up any potential lumps and evenly distributing the dry ingredients.
- Gently fold the dry ingredient mixture into the wet ingredients, stirring carefully until a cohesive, soft dough forms without overmixing.
- The resulting dough should have a rich chocolate color and a slightly tacky texture, indicating it’s ready for the next preparation stage.
Notes
- Chill the dough for at least 30 minutes before baking to prevent spreading and enhance flavor development.
- Use high-quality cocoa powder for a richer, more intense chocolate taste that elevates the cookie’s depth.
- Create a molten center by slightly underbaking the cookies and removing them from the oven when edges are set but middle looks slightly soft.
- Experiment with different chocolate fillings like ganache or caramel to customize the lava effect and add unexpected flavor surprises.
- Prep Time: 10 minutes
- Cook Time: 10 minutes
- Category: Desserts, Snacks
- Method: Baking
- Cuisine: American
Nutrition
- Serving Size: 12
- Calories: 184
- Sugar: 12 g
- Sodium: 95 mg
- Fat: 8 g
- Saturated Fat: 5 g
- Unsaturated Fat: 3 g
- Trans Fat: 0 g
- Carbohydrates: 26 g
- Fiber: 1 g
- Protein: 2 g
- Cholesterol: 20 mg
Jessica Martinez
Pastry Chef & Recipe Developer
Expertise
Organic Baking Techniques, Gluten-Free Recipe Development, Southwestern Dessert Specialties, Food Styling and Photography
Education
Santa Fe Community College (SFCC)
Jessica brings the sweet side to Urban Organic with her passion for baking and love for the Southwest. She trained at Santa Fe Community College and has built a career creating beautiful, gluten-free, and organic desserts that feel both nostalgic and new.
She believes baking should be fun, creative, and open to everyone, no matter your diet or skill level. Jessica’s recipes are simple enough to follow, but special enough to remember.