
Cheerful Joy Of Cooking Thumbprint Cookies Recipe Made Simple
Thumbprint cookies from Joy of Cooking dance with nostalgic charm, beckoning you into a world of sweet comfort.
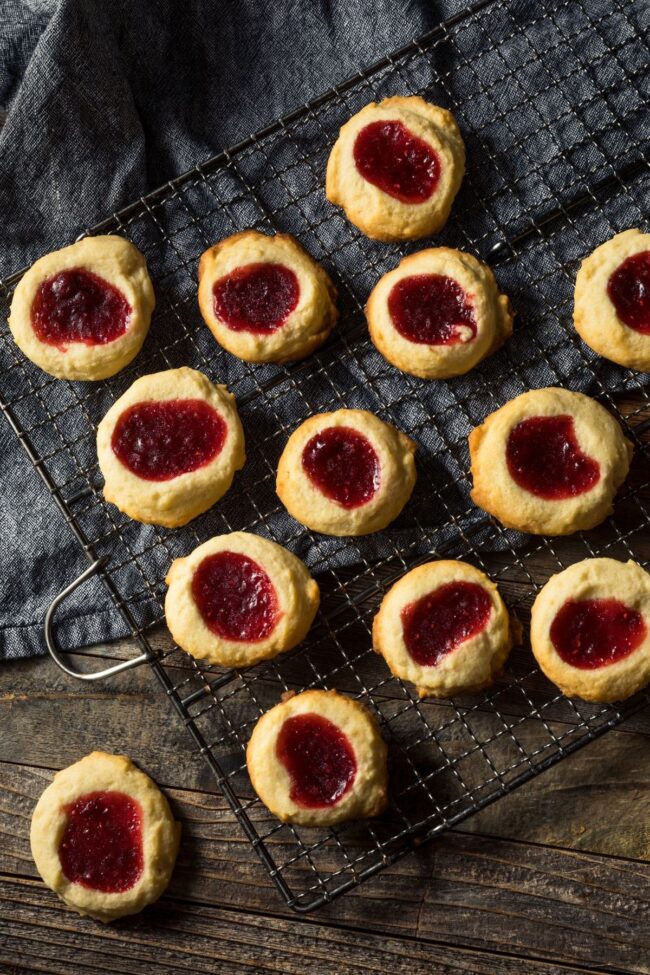
Delicate pastry cradles jewel-like fruit preserves in tender indentations pressed by loving fingers.
Minimal ingredients transform into an extraordinary culinary treasure that sparks pure delight.
Crumbly textures intertwine with bright fruity whispers, creating a symphony of flavor in every bite.
Nutty accents provide a subtle crunch that elevates these classic morsels beyond ordinary desserts.
Effortless to craft and impossible to resist, these cookies capture the essence of home-baked magic.
Each golden-edged morsel promises a blissful escape into deliciousness that will warm your heart and tantalize your taste buds.
Quick Recipe Overview
Thumbprint Cookie Ingredients to Bake Now
For Butter Base:For Dry Ingredients:For Coating and Filling:What You Need for Thumbprint Success
Steps to Shape and Fill Thumbprint Cookies
Set your oven to a cozy 350°F and line a baking sheet with parchment paper. Get your mixing tools ready for a delightful cookie adventure.
Grab your mixer and transform butter into a silky, smooth dream. Beat it until it looks like fluffy clouds, ensuring no lumps remain.
Blend sugar, egg yolk, and vanilla into the butter. Mix everything until it becomes a harmonious, sweet mixture. Scrape down the sides to catch every delicious bit.
Sift together flour and salt, then gently fold into the butter blend. If the dough feels too soft, give it a quick chill in the refrigerator to firm up.
Roll the dough into small balls. Dip each one in egg whites, then lovingly coat with chopped nuts. Create a tiny well in the center of each cookie using your thumb.
Fill the little cookie wells with a dollop of your favorite jam. This is where the magic happens – a surprise center that will make taste buds dance.
Slide your cookie masterpieces into the oven. Bake for about 12 minutes until the nuts turn a beautiful golden brown and the cookies look irresistibly delicious. Let them cool on a wire rack and watch them disappear!
Tips for Perfect Centers and Dough
Presenting Thumbprints That Impress
How to Keep Cookies from Getting Soggy
Print
Buttery Thumbprint Cookies Recipe
- Total Time: 35 minutes
- Yield: 24 1x
Description
Classic thumbprint cookies combine buttery shortbread with sweet raspberry jam for a delightful treat. Homemade cookies deliver comfort and nostalgia, connecting bakers to cherished family traditions.
Ingredients
- ½ cup (113 g) unsalted butter, at room temperature
- 1 large (50 g) egg, separated
- 1 cup (130 g) all-purpose flour
- ¾ – 1 cup (75 – 100 g) walnuts, toasted and finely chopped (can also use pecans, almonds, or hazelnuts)
- ¼ cup (50 g) granulated white sugar
- ¼ cup (70 g) raspberry jam (can use other flavors of jam)
- ½ tsp (2 g) pure vanilla extract
- ¼ tsp (1 g) salt
Instructions
- Preparation: Centralize the oven rack and heat to 350°F (180°C). Line a baking sheet with parchment paper. Cream butter in an electric mixer until smooth and silky.
- Mixing Base: Blend sugar thoroughly into the butter. Integrate egg yolk and vanilla extract, ensuring complete incorporation by scraping the bowl’s sides. Separately, combine flour and salt.
- Dough Formation: Gently fold dry ingredients into the butter mixture until just combined. If the dough feels soft, refrigerate for 30-60 minutes to achieve optimal consistency. Whisk egg whites until slightly foamy and finely chop nuts.
- Cookie Shaping: Form dough into small balls, dipping each into egg whites, then completely coating with chopped nuts. Arrange on the prepared baking sheet, spaced 2 inches apart.
- Finishing Details: Use your thumb or a wooden spoon handle to create a gentle indentation in each cookie’s center. Fill the wells with jam, ensuring an even distribution.
- Baking: Slide the baking sheet into the preheated oven and bake for 12-14 minutes. Look for golden-brown nuts and set cookies as indicators of perfect doneness. Transfer immediately to a wire cooling rack to prevent continued cooking.
Notes
- Chill Dough Strategically: Refrigerate dough for 30-60 minutes if too soft, ensuring easier handling and preventing cookie spread during baking.
- Master Egg White Technique: Whisk egg whites until slightly foamy to help nuts adhere perfectly to cookie surface without excess moisture.
- Portion Precisely: Use a kitchen scale to create uniform 15-gram dough balls, guaranteeing consistent cookie size and even baking.
- Handle Thumbprint Carefully: Create gentle indentations using thumb or wooden spoon handle, avoiding pressing too deeply to prevent cookie cracking.
- Prep Time: 20 minutes
- Cook Time: 15 minutes
- Category: Desserts, Snacks
- Method: Baking
- Cuisine: American
Nutrition
- Serving Size: 24
- Calories: 189
- Sugar: 9 g
- Sodium: 49 mg
- Fat: 14 g
- Saturated Fat: 8 g
- Unsaturated Fat: 6 g
- Trans Fat: 0 g
- Carbohydrates: 17 g
- Fiber: 1 g
- Protein: 3 g
- Cholesterol: 37 mg
Michael Thompson
Founder & Culinary Director
Expertise
Classical & Contemporary Cooking Techniques, Global Cuisine Appreciation, Nutrition & Menu Engineering, Sustainable Cooking Practices, Farm-to-Table Cuisine
Education
Southwestern Oregon Community College
Michael grew up in Oregon, where he learned early that food tastes better when it’s fresh, local, and made with care.
After earning his degree from the Southwestern Oregon Community College, he focused his career on teaching others how to cook with the seasons, reduce food waste, and reconnect with what’s on their plate.
Michael keeps his cooking simple, sustainable, and full of flavor. His favorite part of the process? Watching people realize how easy and satisfying it can be to cook a single great meal from scratch.