Brown Butter Brownies Recipe

Gooey Brown Butter Brownies Recipe: Irresistible Sweet Treat

Chocolate and nutty brown butter create a magical combination in these irresistible brownies.

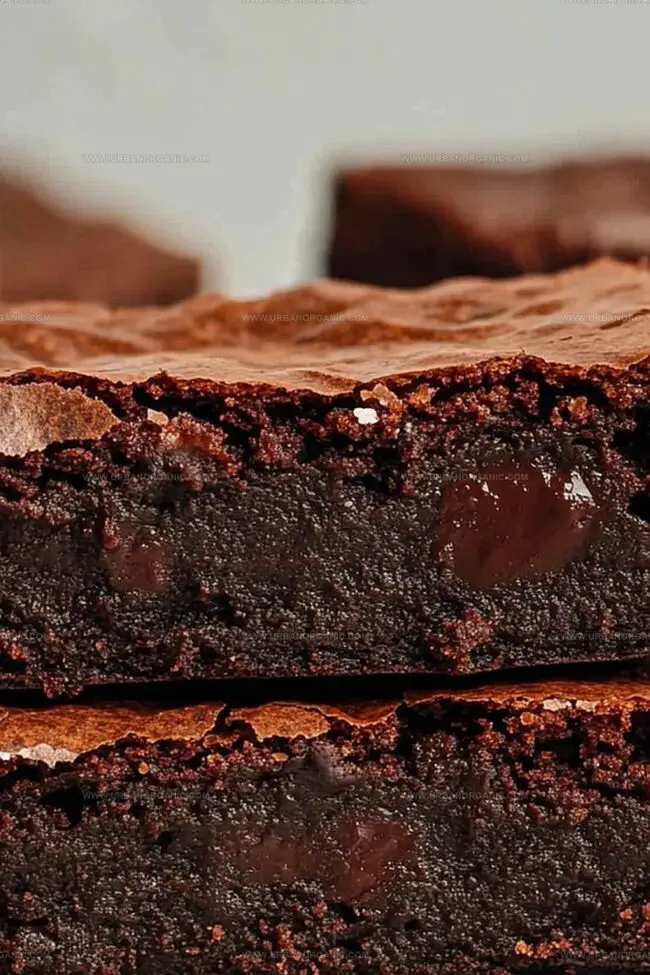
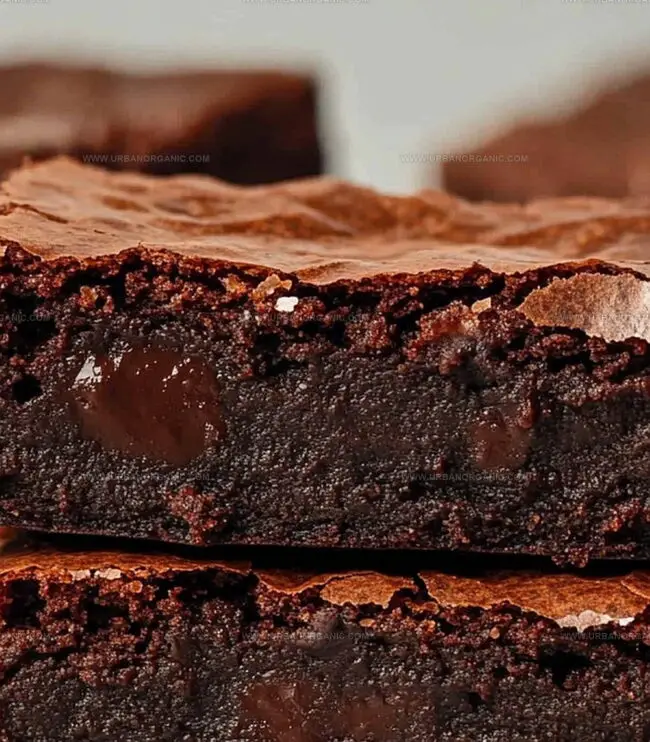
Melted chocolate swirls through rich, caramelized butter, producing deep layers of flavor.

Sweet aromas will drift through your kitchen while baking these decadent treats.

Deeply satisfying textures emerge from carefully balanced ingredients that promise indulgence.

Hints of toasted caramel peek through each dense, fudgy bite.

Every baker can master this simple yet sophisticated dessert with confidence.

You’ll want to savor each incredible square slowly and share with someone special.

What Sets Brown Butter Brownies Apart

  • Brown butter adds a rich, nutty depth that transforms ordinary brownies into an extraordinary culinary experience with minimal extra effort.
  • This recipe requires basic ingredients and straightforward techniques, making it accessible for bakers of all skill levels, from beginners to experienced home cooks.
  • Perfect for potlucks, family gatherings, or spontaneous sweet cravings, these brownies deliver a decadent chocolate treat that will impress everyone at the table without complicated steps.
  • The method ensures a delightful balance between fudgy and cakey brownies, with a crisp top and moist, tender interior that creates an irresistible mouthfeel.

All the Ingredients for Brown Butter Brownies

Fats and Base:
  • Brown Butter: Rich, nutty flavor that adds depth to the brownies with a deep caramel-like taste.
  • Granulated Sugar, Brown Sugar: Sweet base that provides moisture and complex caramel notes.
Proteins and Binding:
  • Eggs: Essential for structure and creating a smooth, fudgy texture.
  • Vanilla Extract: Enhances overall flavor with warm, sweet undertones.
Dry Ingredients:
  • All-Purpose Flour: Creates the structural foundation for the brownies.
  • Cocoa Powder: Provides intense chocolate flavor and dark color.
  • Salt: Balances sweetness and enhances chocolate taste.
  • Baking Powder: Helps brownies rise slightly and creates a tender crumb.
Optional Add-Ins:
  • Chocolate Chips: Adds extra chocolate bursts and melty pockets throughout the brownies.

Directions to Bake Brown Butter Brownies

Step 1: Transform Butter Into Liquid Gold

  • Grab a small saucepan
  • Melt butter over medium heat
  • Swirl pan gently while butter transforms
  • Watch for golden brown color with rich nutty aroma
  • Remove from heat when butter looks caramel-like
  • Let butter cool down slightly

Step 2: Mix Decadent Brownie Base

  • Heat oven to 350°F
  • Prepare 8×8-inch baking pan with parchment paper
  • Combine brown butter with
  • Granulated sugar
  • Brown sugar
  • Whisk until smooth and glossy
  • Add eggs and vanilla extract
  • Beat mixture until light and fluffy
  • Sift dry ingredients
  • Cocoa powder
  • All-purpose flour
  • Salt
  • Baking powder
  • Fold ingredients gently
  • Add chocolate chips if desired

Step 3: Bake To Chocolatey Perfection

  • Transfer batter to prepared pan
  • Spread evenly with spatula
  • Bake for 25-30 minutes
  • Check with toothpick for moist crumbs
  • Allow brownies to cool completely
  • Slice and serve delightful treats

Handy Insights for Brown Butter Brownies Success

  • Perfectly Brown Butter: Swirl the pan continuously while browning to ensure even heating and prevent burning, watching for a golden color and nutty aroma.
  • Prevent Overmixing: Gently fold dry ingredients into wet ingredients just until combined to maintain a fudgy, tender brownie texture without developing tough gluten.
  • Customize Chocolate Intensity: Experiment with different chocolate chip varieties like dark, milk, or semi-sweet to adjust the overall richness and depth of flavor.
  • Check Doneness Carefully: Use the toothpick test strategically – look for moist crumbs, not wet batter, to guarantee a perfectly fudgy, not dry, brownie consistency.
  • Cool Completely Before Cutting: Allow brownies to cool entirely at room temperature to set the structure and ensure clean, neat slicing without crumbling.

Keeping Brown Butter Brownies Fresh and Tasty

  • Store brownies in an airtight container for up to 5 days, keeping them fresh and moist inside the fridge.
  • Wrap individual brownies tightly in plastic wrap, then place in a freezer-safe bag and freeze for 2-3 months.
  • Warm refrigerated brownies in the microwave for 10-15 seconds or let them sit at room temperature for 15 minutes before serving.
  • Keep brownies at room temperature for 2 days in a sealed container, ensuring they stay soft and delicious.

Brown Butter Brownies Serving Companions

  • Pair rich, nutty brown butter brownies with creamy vanilla bean ice cream for a classic dessert experience.
  • Serve alongside crunchy toasted almond slivers or candied pecans to add delightful crunch against the brownies' fudgy interior.
  • Match with robust coffee like espresso or dark roast, which beautifully highlights the browned butter's deep, caramelized notes.
  • Select a sweet port wine or late harvest Zinfandel that complements the brownies' intense chocolate and nutty undertones without overwhelming the delicate flavors.

Flavor Twists on Brown Butter Brownies

  • Gluten-Free Brownie Version: Replace all-purpose flour with almond flour or a gluten-free flour blend to create a celiac-friendly dessert that maintains the rich, nutty brown butter flavor.
  • Vegan Chocolate Delight: Swap eggs with mashed banana or flax eggs, use plant-based butter, and select dairy-free chocolate chips to craft a completely animal-product-free brownie experience.
  • Keto-Friendly Option: Substitute sugar with erythritol or stevia, use almond flour instead of regular flour, and add extra dark chocolate with high cocoa content to keep the brownie low-carb and keto-compliant.
  • Nut-Enhanced Variation: Incorporate chopped walnuts or pecans into the batter for added crunch and depth, complementing the brown butter's nutty undertones and creating a more textured brownie.

Questions About Brown Butter Brownies Answered

  • What makes brown butter different from regular melted butter?

Brown butter adds a deep, nutty, caramel-like flavor through a cooking process that transforms milk solids, creating a richer and more complex taste profile compared to regular melted butter.

  • Can I use salted butter instead of unsalted butter?

Yes, but reduce or eliminate additional salt in the recipe. Salted butter can slightly alter the final taste and saltiness of your brownies, so adjust seasoning accordingly.

  • How do I know when the butter is perfectly browned?

Look for a golden amber color and a nutty, toasted aroma. The butter will have small brown specks at the bottom of the pan, and it should smell rich and slightly caramelized, not burned.

  • Why should I not overmix the brownie batter?

Overmixing develops gluten in the flour, which can make brownies tough and dense instead of fudgy and tender. Mix just until ingredients are combined to maintain the desired soft, rich texture.

Print
clock clock iconcutlery cutlery iconflag flag iconfolder folder iconinstagram instagram iconpinterest pinterest iconfacebook facebook iconprint print iconsquares squares iconheart heart iconheart solid heart solid icon
Brown Butter Brownies Recipe

Brown Butter Brownies Recipe


5 Stars 4 Stars 3 Stars 2 Stars 1 Star

4.7 from 39 reviews

  • Total Time: 40 minutes
  • Yield: 16 1x

Description

Brown butter brownies elevate classic chocolate desserts with rich, nutty caramel notes that dance across your palate. Silky chocolate squares melt into golden-kissed butter, creating an irresistible treat promising pure indulgence with each luxurious bite.


Ingredients

Scale

Chocolate and Butter Base:

  • ½ cup (115 g / 4 ounces) unsalted butter
  • ½ cup (60 g / 2.1 ounces) unsweetened cocoa powder
  • ½ cup (90 g / 3.2 ounces) chocolate chips or chunks (optional)

Sugars:

  • 1 cup (200 g / 7 ounces) granulated sugar
  • ½ cup (100 g / 3.5 ounces) brown sugar

Wet and Dry Ingredients:

  • 2 large eggs
  • 1 teaspoon vanilla extract
  • ½ cup (65 g / 2.3 ounces) all-purpose flour
  • ¼ teaspoon salt
  • ½ teaspoon baking powder

Instructions

  1. Transform butter into a golden elixir by heating it in a small saucepan over medium flame, gently swirling to ensure even transformation. Watch carefully as the butter develops a rich, nutty aroma and transforms to a deep amber color, approximately 3-5 minutes. Immediately remove from heat to prevent burning, allowing the liquid gold to cool slightly.
  2. Prepare the oven sanctuary by warming it to 350°F (175°C). Protect an 8×8-inch baking vessel with parchment paper or a light coating of grease.
  3. Create a silky flavor base by whisking the browned butter with granulated and brown sugars until they meld into a harmonious mixture.
  4. Introduce eggs and vanilla extract, vigorously blending until the mixture becomes airy and light, typically requiring about one minute of dedicated whisking.
  5. Sift the dry companions – cocoa powder, flour, salt, and baking powder – into the wet mixture. Fold gently with a delicate touch, ensuring ingredients are just combined without overmixing.
  6. If desired, fold chocolate chips into the batter, distributing them evenly throughout the dark, luxurious mixture.
  7. Transfer the batter to the prepared pan, smoothing the surface to create an even landscape of chocolatey promise.
  8. Slide the pan into the preheated oven, allowing the brownies to bake for 25-30 minutes. The perfect moment arrives when a inserted toothpick emerges with moist crumbs, not wet batter.
  9. Exercise patience by letting the brownies cool completely, which allows them to set and develop their ultimate texture before slicing into decadent squares.

Notes

  • Ensure butter turns a deep golden brown with a rich, nutty aroma, swirling pan consistently to prevent burning.
  • Control mixing to maintain fudgy texture by folding dry ingredients gently and avoiding overmixing the batter.
  • Use room temperature eggs for smoother batter integration and more even brownie consistency.
  • Allow brownies to cool completely before cutting to achieve clean, precise slices and optimal dense texture.
  • Prep Time: 15 minutes
  • Cook Time: 25 minutes
  • Category: Desserts
  • Method: Baking
  • Cuisine: American

Nutrition

  • Serving Size: 16
  • Calories: 400
  • Sugar: 3 g
  • Sodium: 600 mg
  • Fat: 22 g
  • Saturated Fat: 5 g
  • Unsaturated Fat: 15 g
  • Trans Fat: 0 g
  • Carbohydrates: 38 g
  • Fiber: 3 g
  • Protein: 20 g
  • Cholesterol: 50 mg
Jessica Martinez

Jessica Martinez

Pastry Chef & Recipe Developer

Expertise

Organic Baking Techniques, Gluten-Free Recipe Development, Southwestern Dessert Specialties, Food Styling and Photography

Education

Santa Fe Community College (SFCC)

  • Program: Certificate in Patisserie
  • Focus: Cultivating disciplined kitchen preparation for a safe, organized, and sanitary workstation; mastering the timely production of nutritious, visually appealing pastries; safely operating standard pastry equipment; and honing core patissier techniques for professional pastry work.

Jessica brings the sweet side to Urban Organic with her passion for baking and love for the Southwest. She trained at Santa Fe Community College and has built a career creating beautiful, gluten-free, and organic desserts that feel both nostalgic and new.

She believes baking should be fun, creative, and open to everyone, no matter your diet or skill level. Jessica’s recipes are simple enough to follow, but special enough to remember.

Leave a Reply

Your email address will not be published. Required fields are marked *

Recipe rating 5 Stars 4 Stars 3 Stars 2 Stars 1 Star